Get started with NeuroWatch
Set up a recorder, add your cameras and, if you like, watch them from anywhere.
Install NeuroWatch
NeuroWatch runs on a Windows or Linux computer on the same network as your cameras. That computer is your recorder: it captures, records and plays back on its own, with or without the cloud.
Download the installer
The free version runs up to 16 cameras; NeuroWatch Unlimited has no software camera limit. Install it like any other app.
Open NeuroWatch
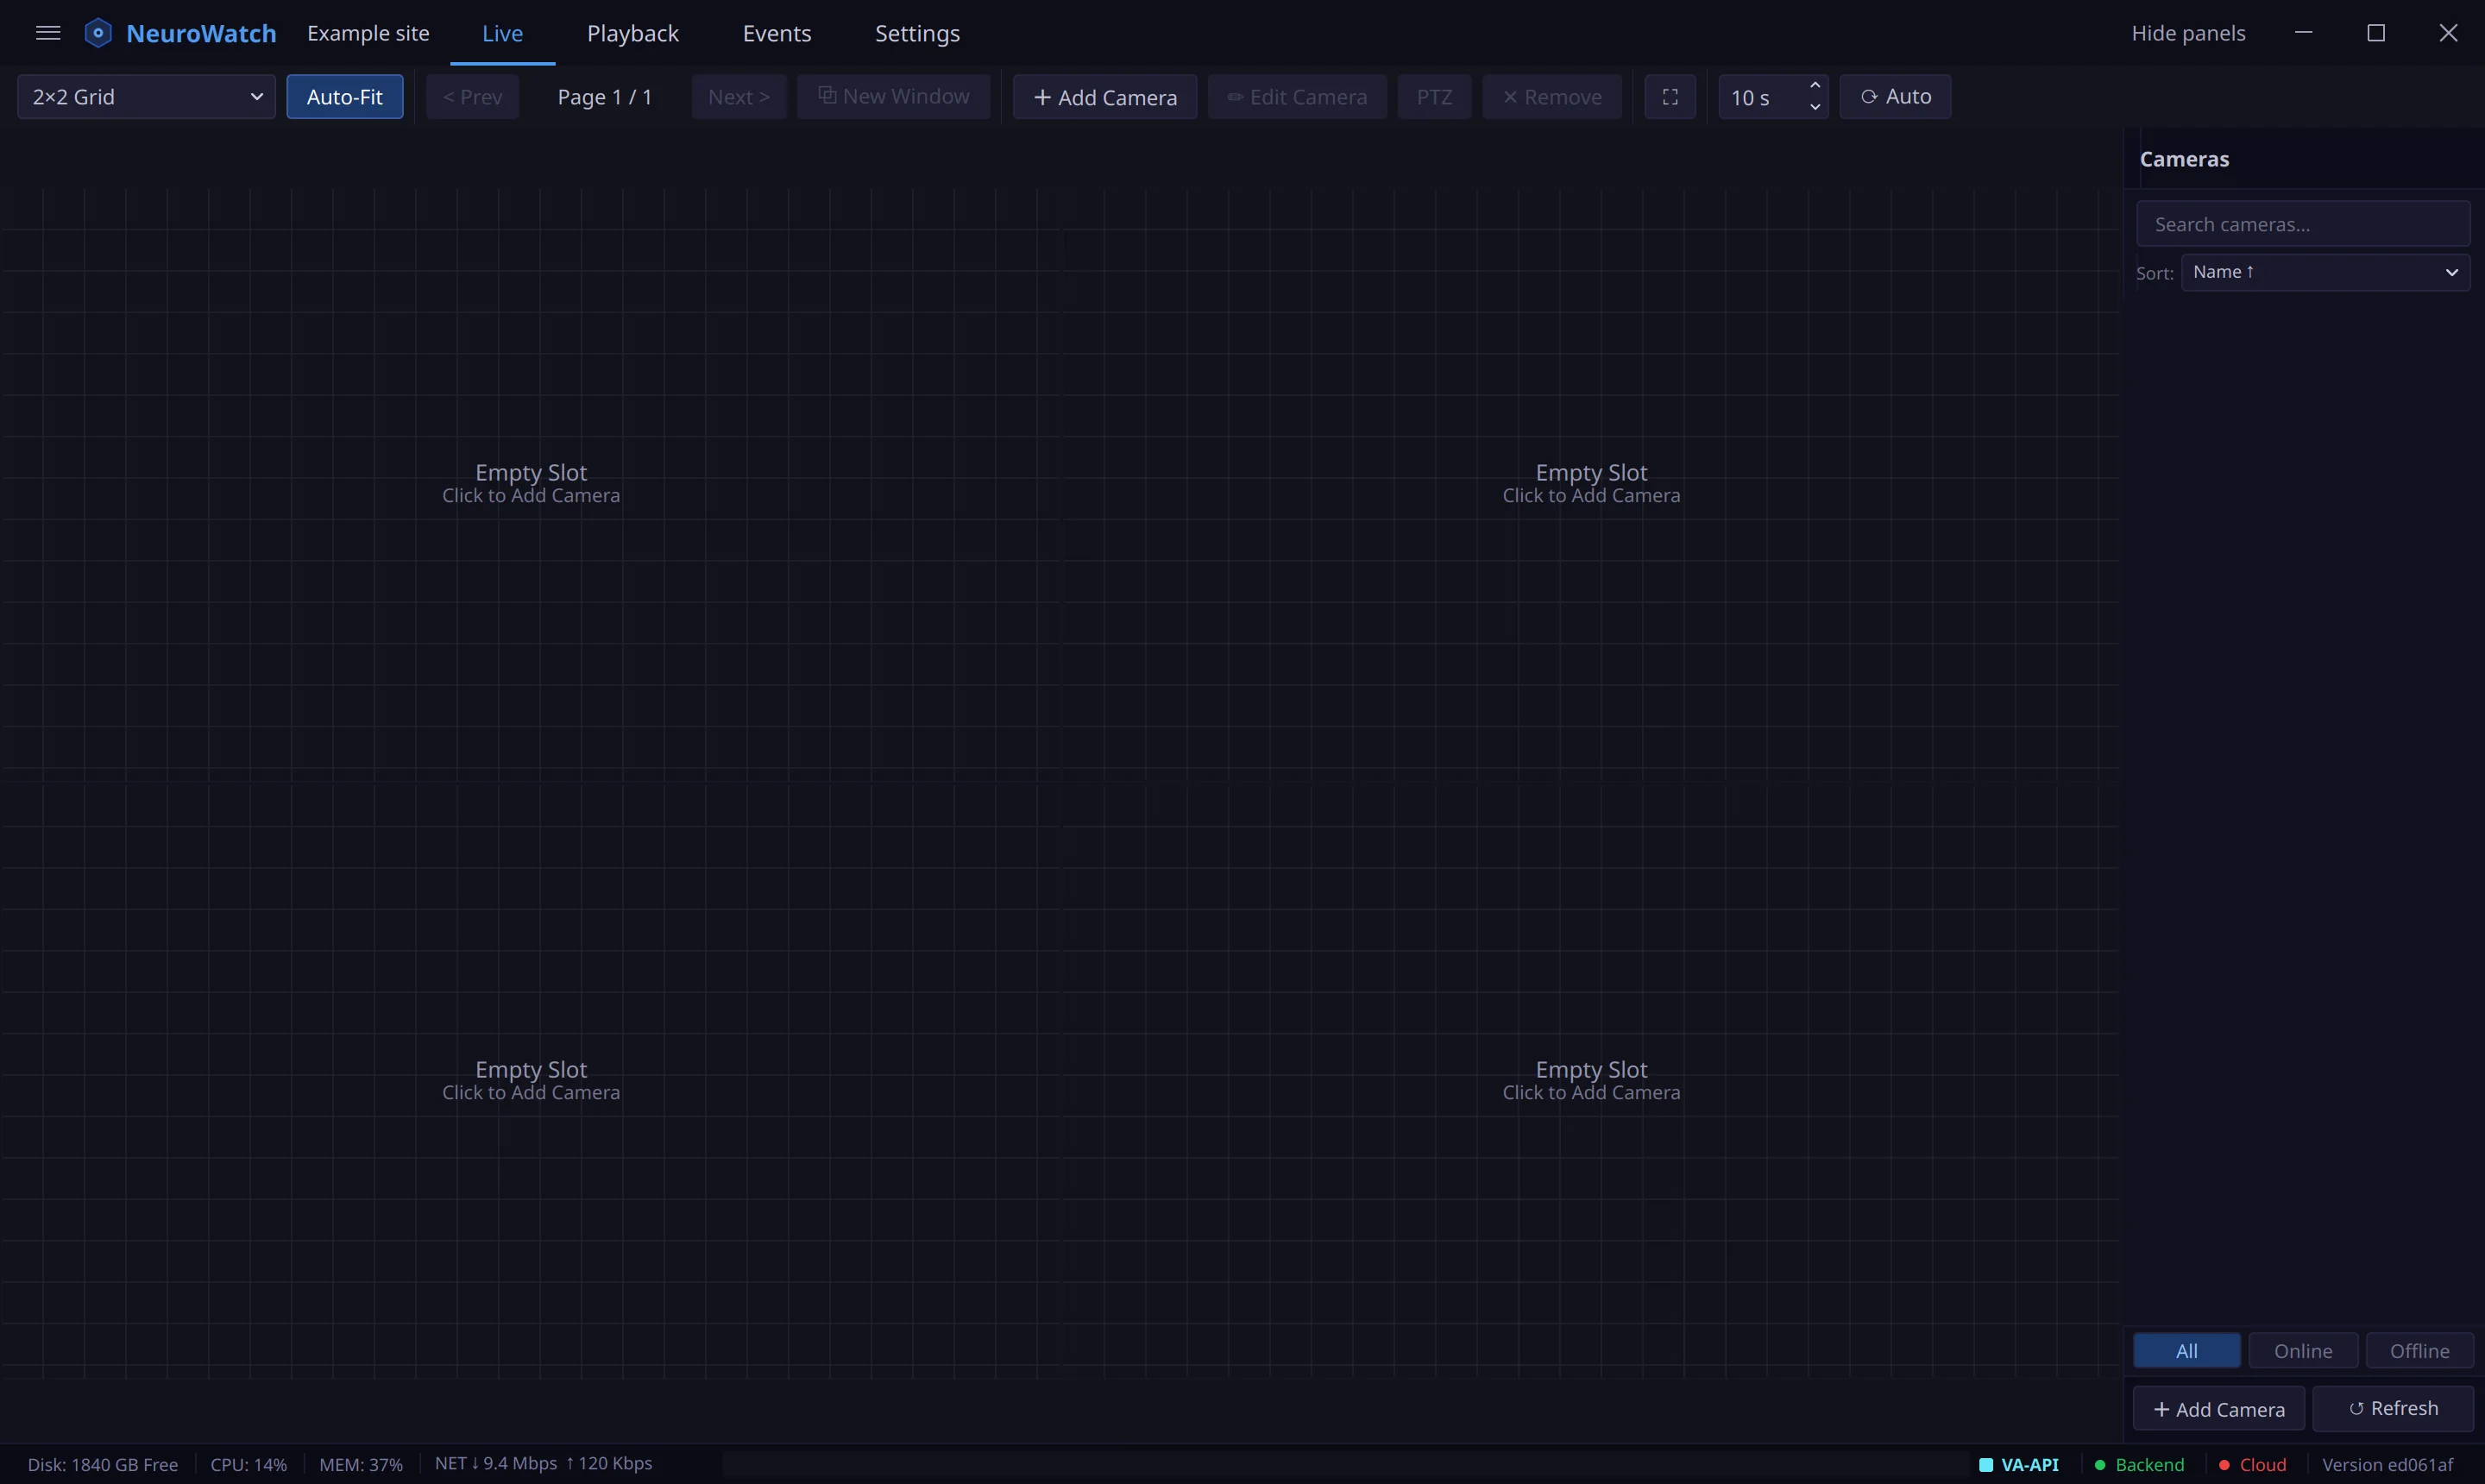
The first time it opens, the video wall is empty and every slot offers to add a camera. Add Camera in the toolbar does the same.
Add your cameras
NeuroWatch works with most IP cameras. Cameras that support ONVIF (look for it on the box or spec sheet) are found for you; any other can be added by hand, using the details from its manual.
Search the network
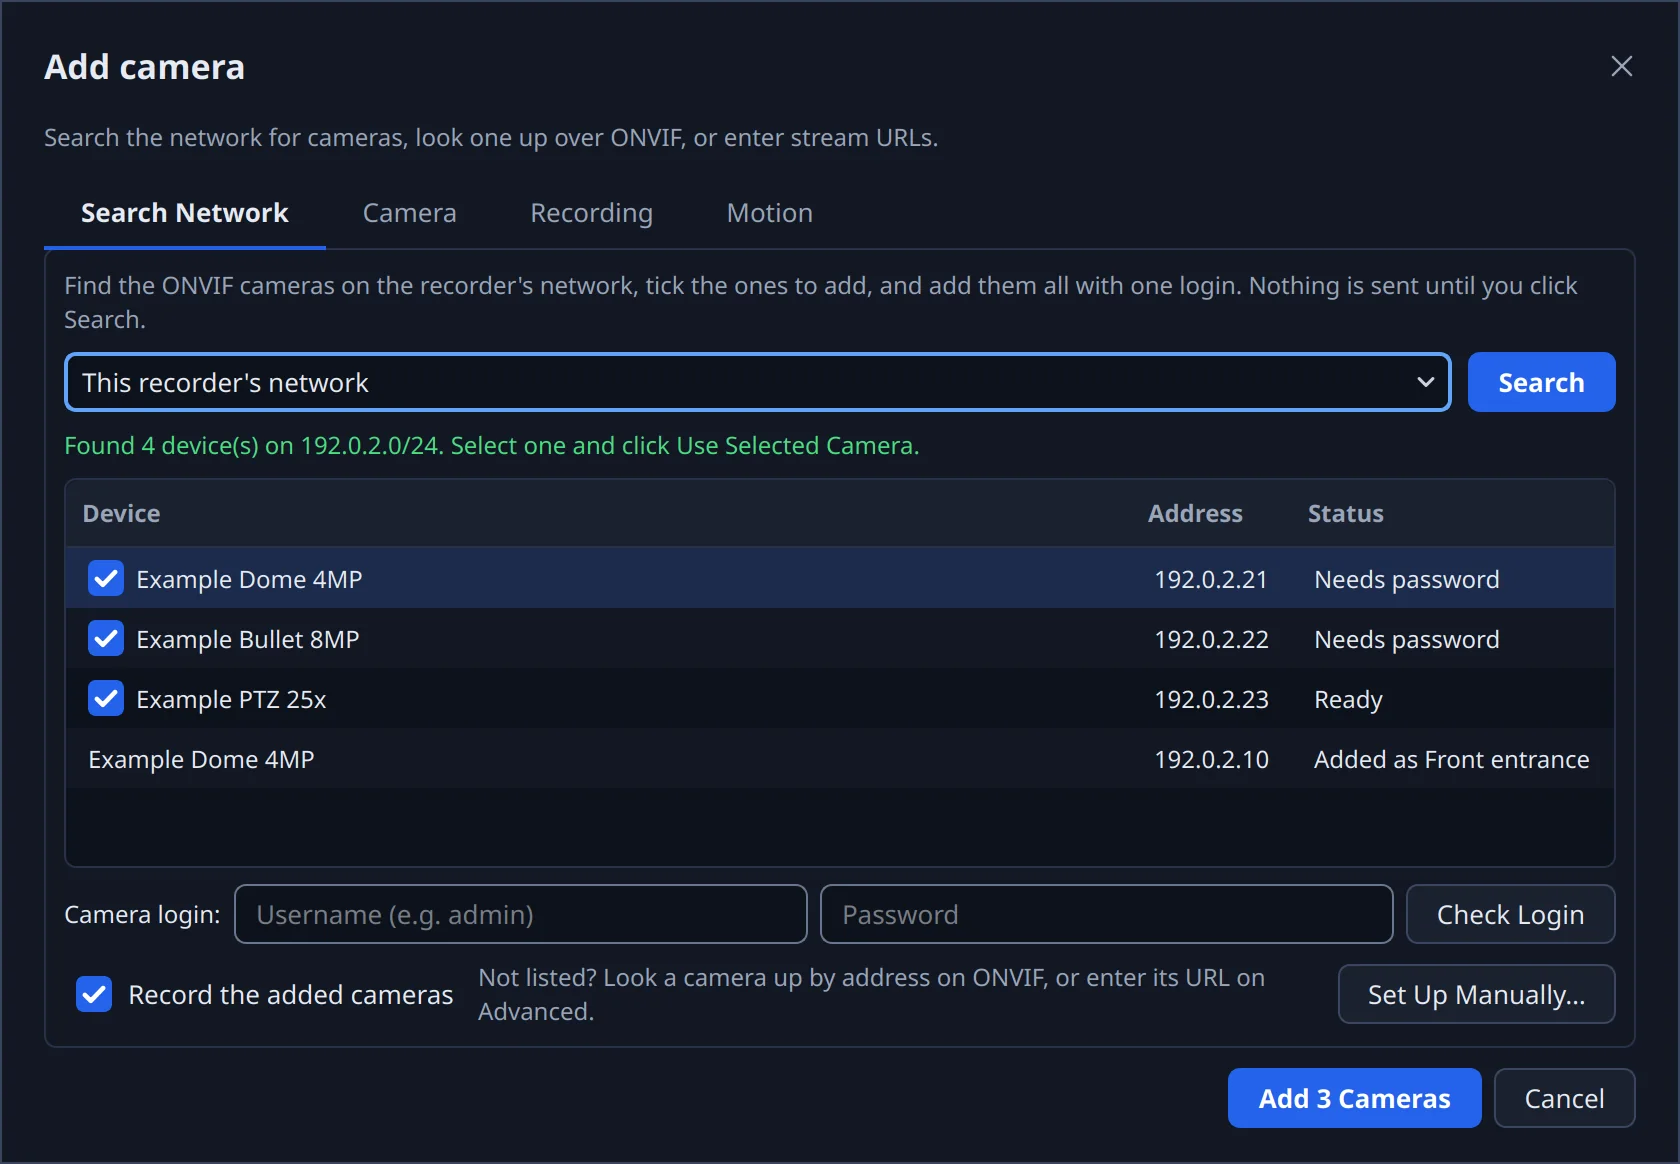
Click Add Camera, open Search Network and click Search. Tick the cameras to add, enter their login once, and add them together. A camera that is already on the wall shows who it was added as.
Or set one up by hand
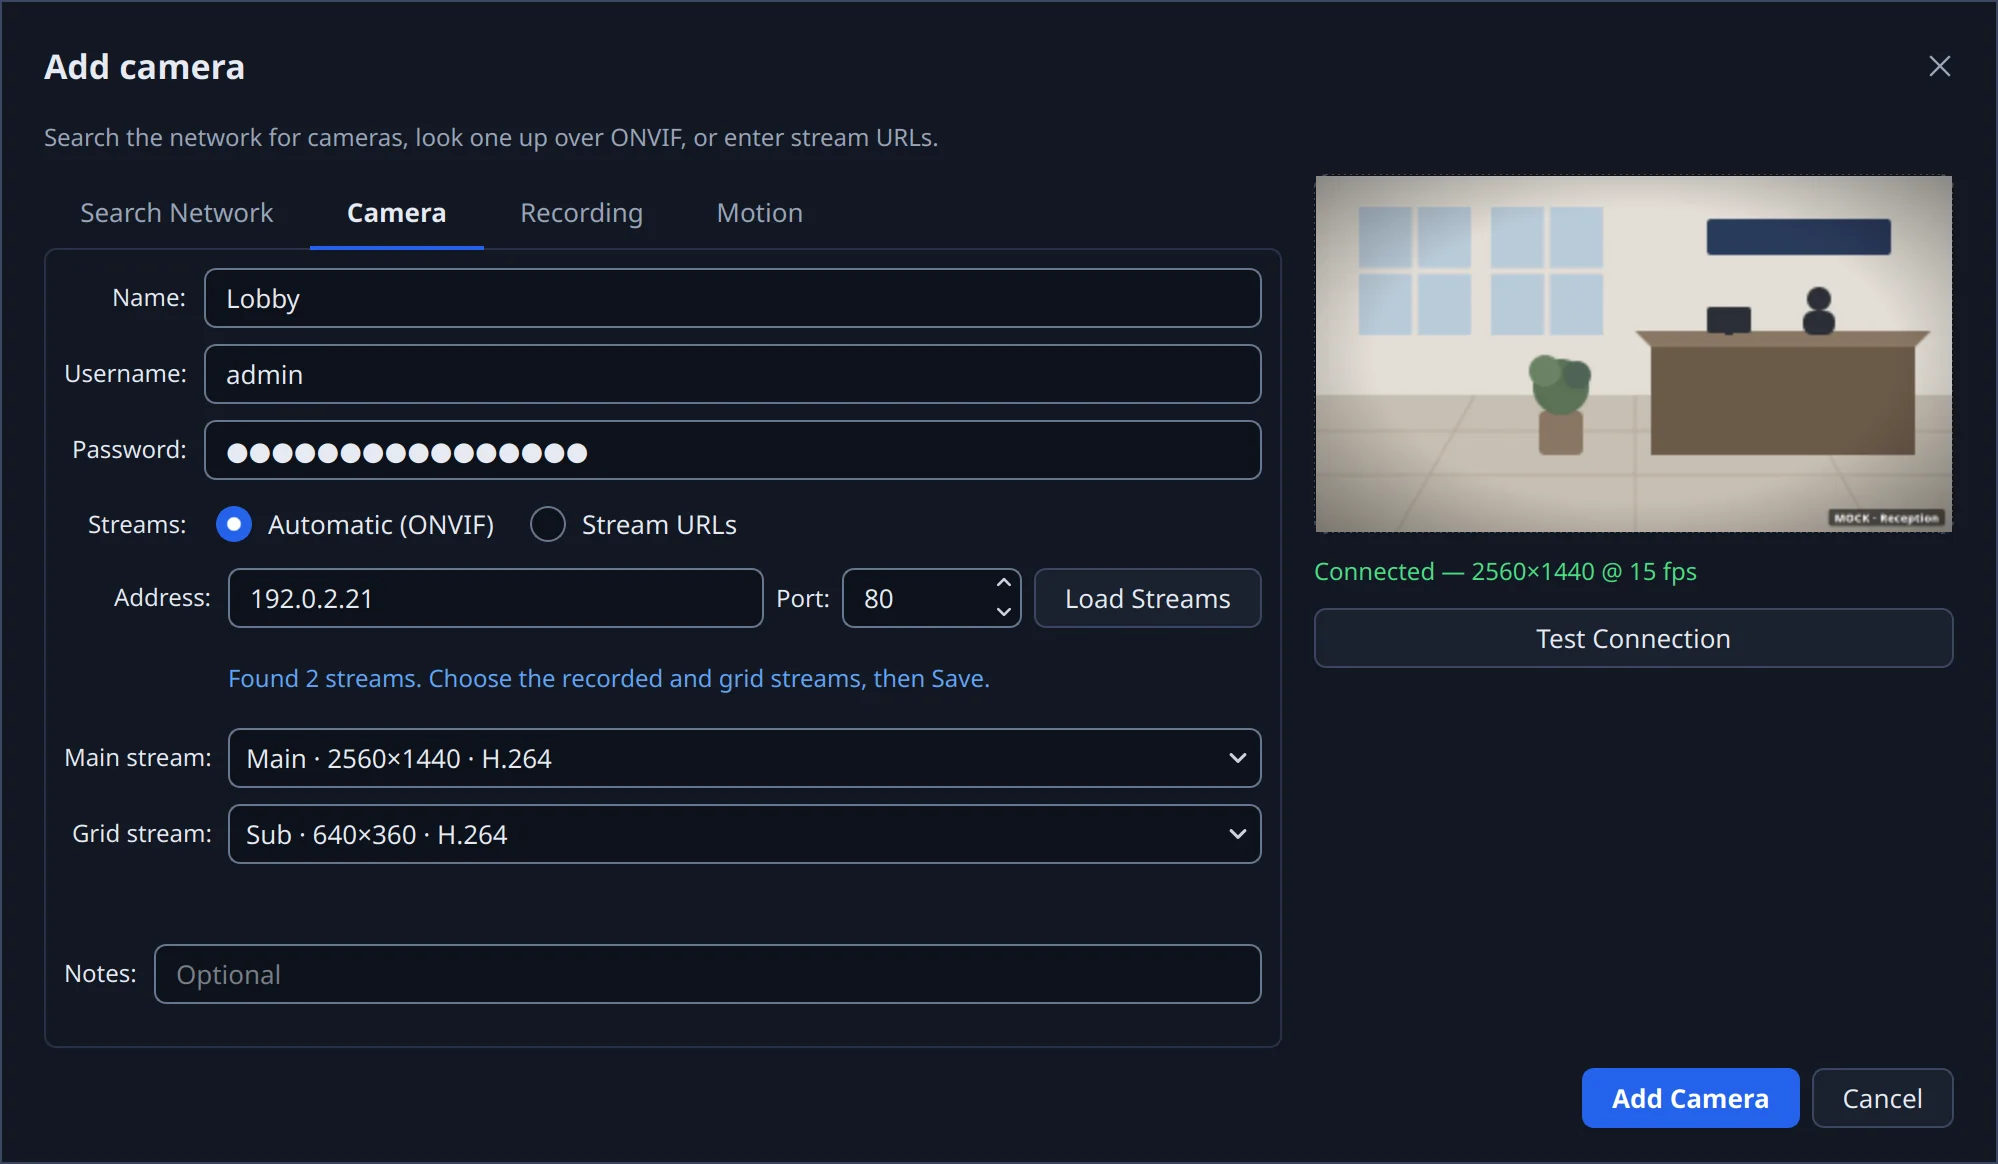
On the Camera tab, enter the camera's name, username, password and address, then click Load Streams. Choose the Main stream, which is recorded, and the Grid stream shown on the wall. Test Connection shows a preview before you save.
Watch the wall
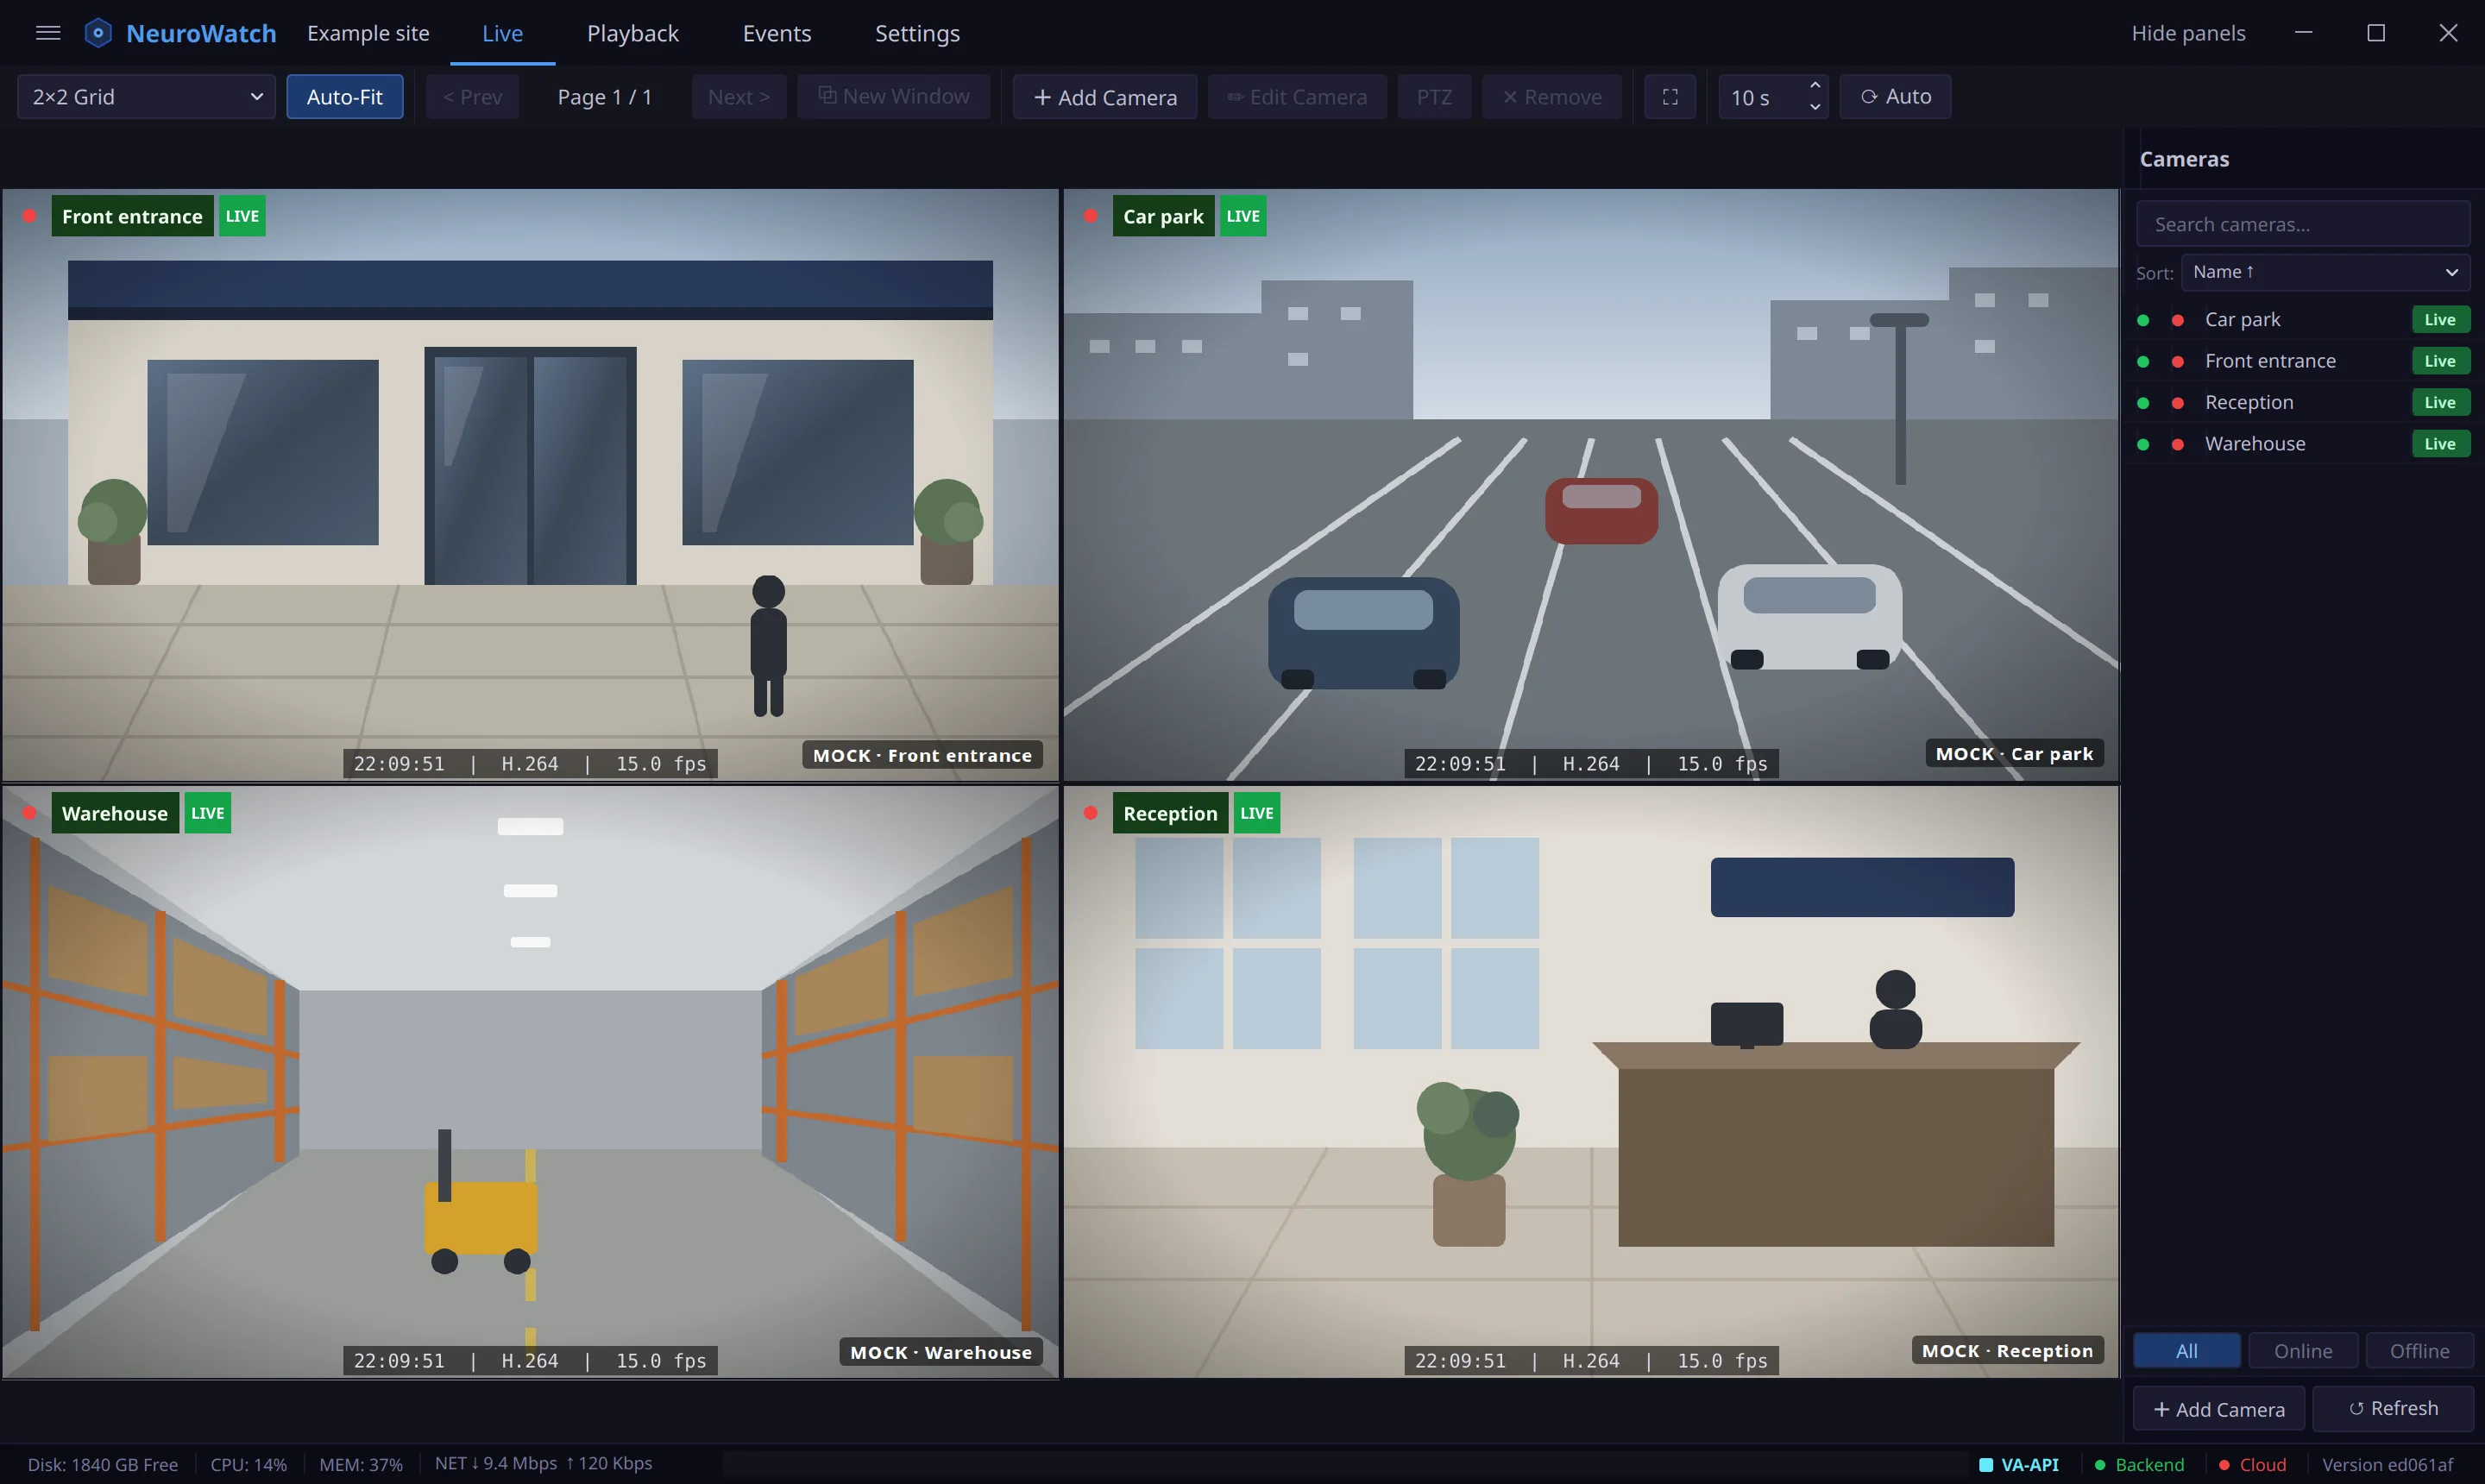
Added cameras appear on the video wall, live. A red dot on a tile means the camera is recording.
Watch recordings
Everything a camera records stays on the recorder. Playback shows several cameras side by side on one timeline, so you can follow something from camera to camera.
Load a time range
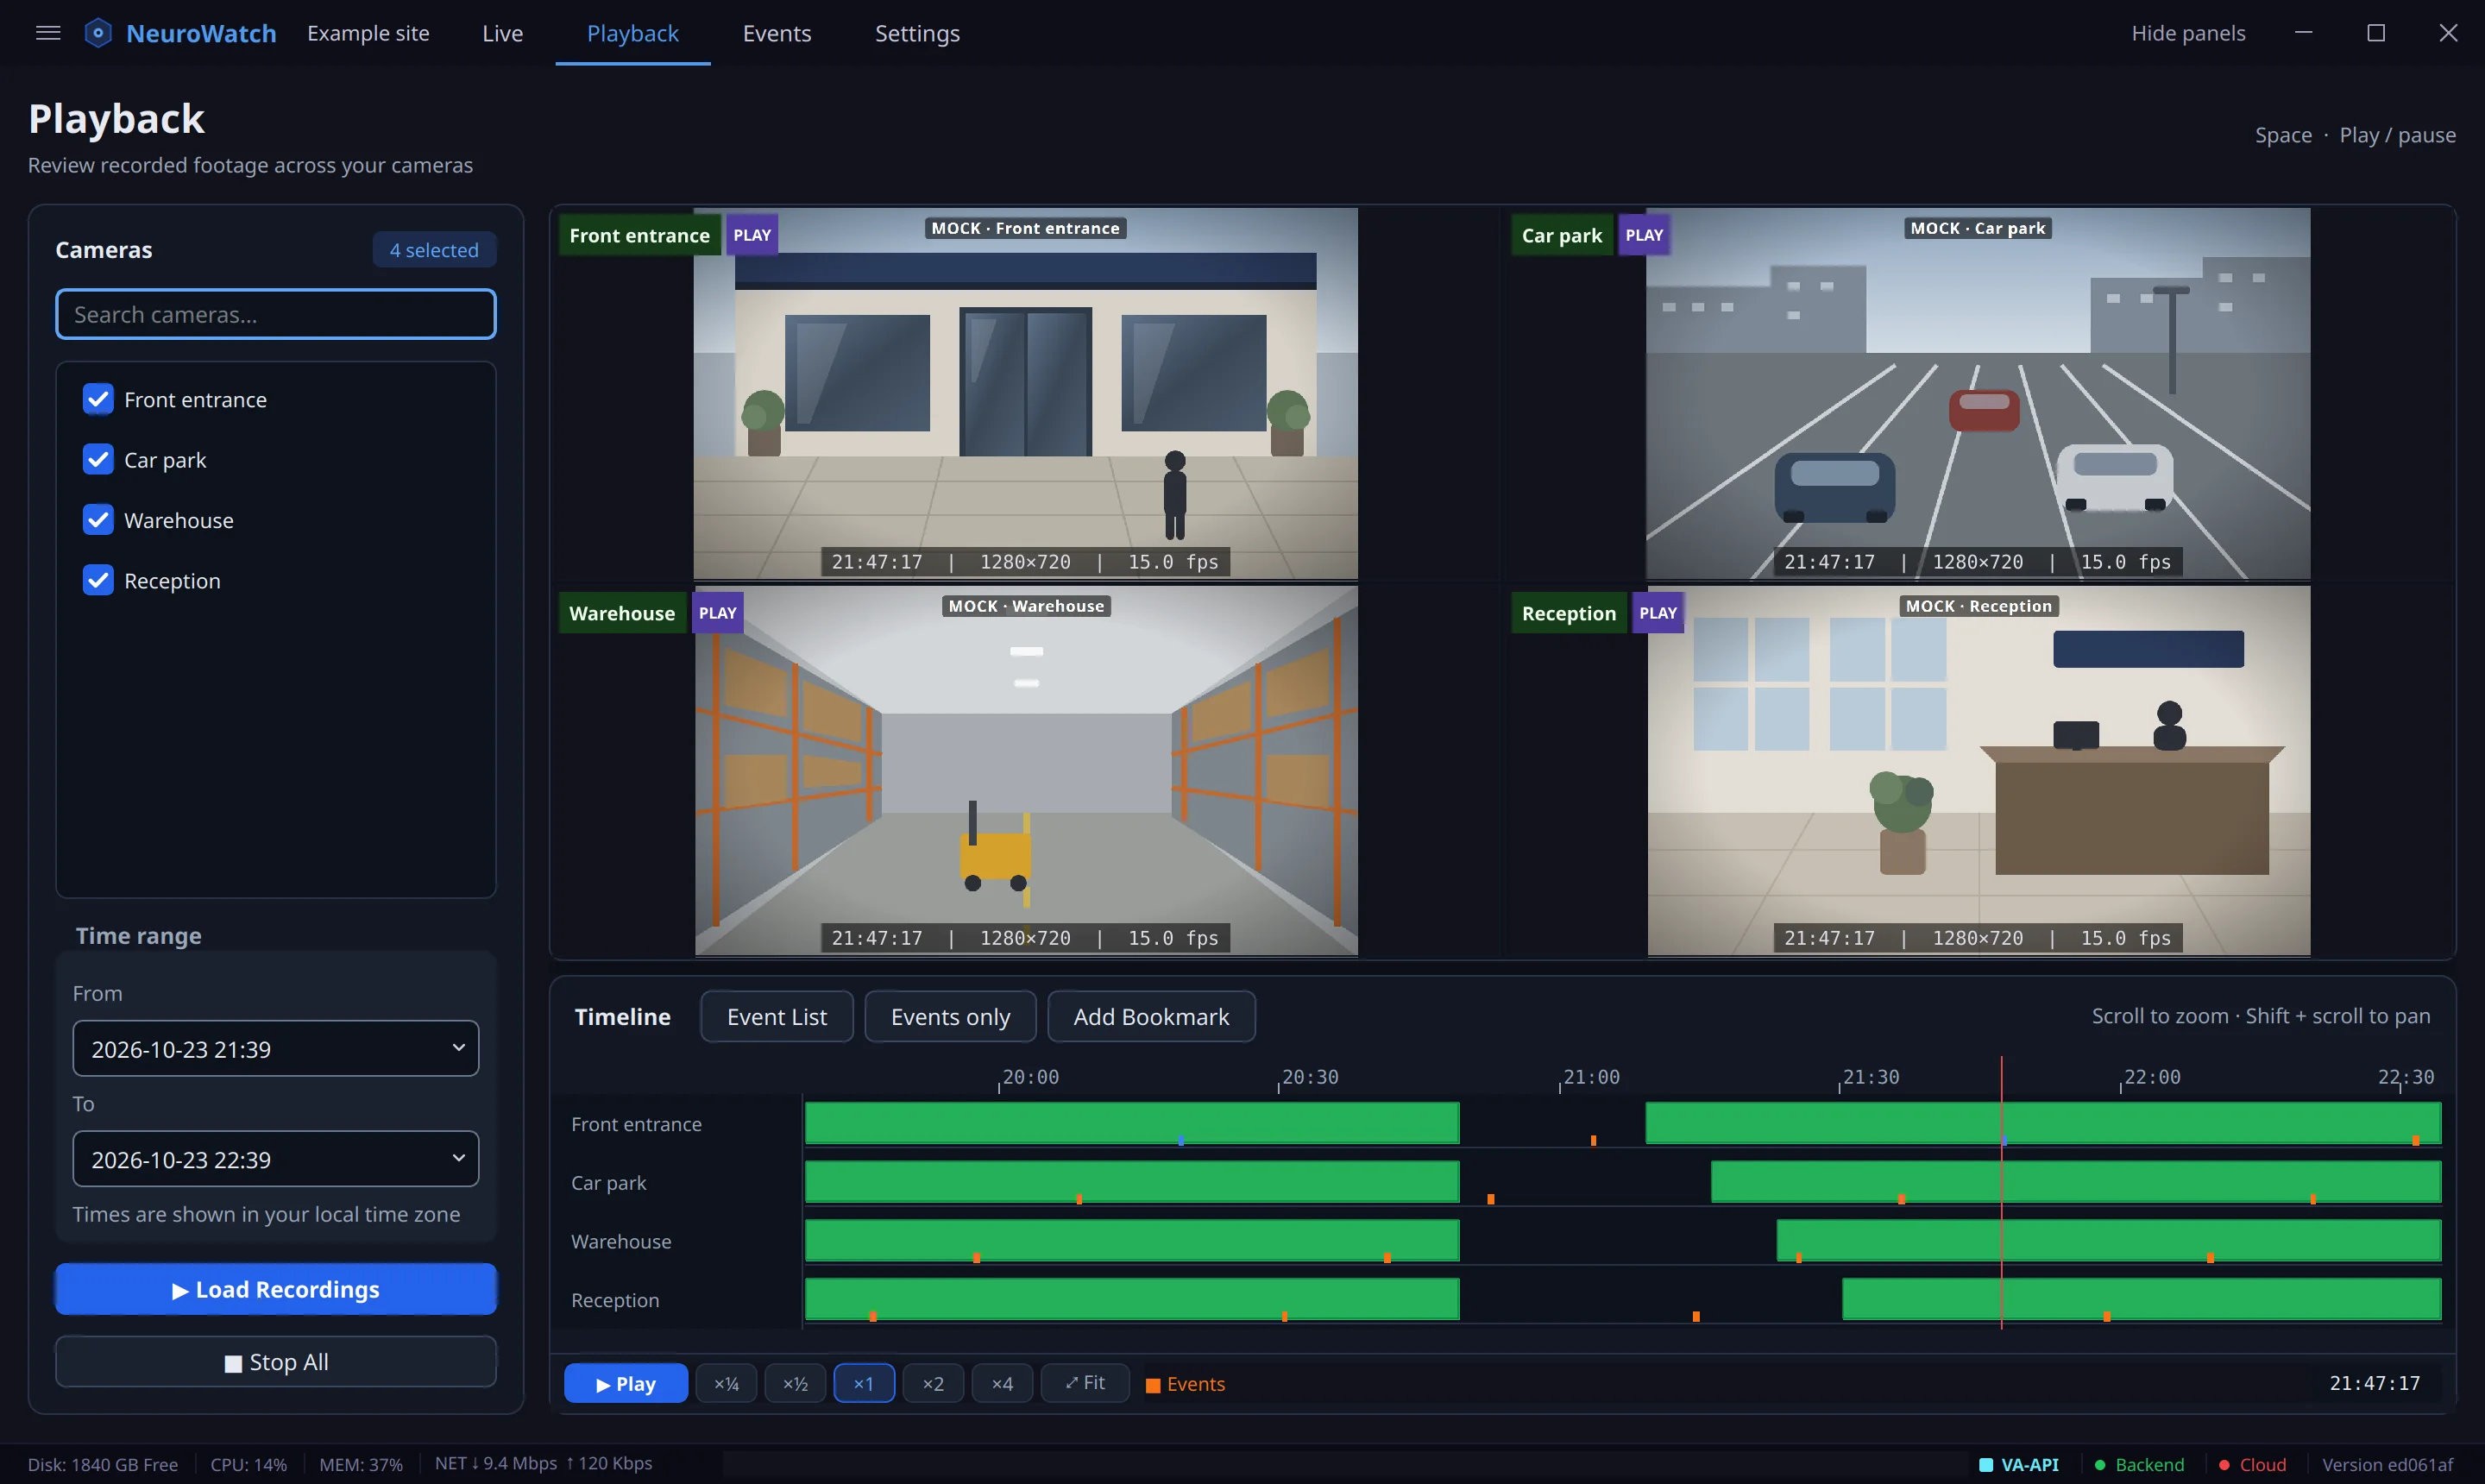
Open Playback, tick the cameras to watch, choose From and To, and click Load Recordings. Each camera gets a row on the timeline: green is recorded, the small marks are events.
Move through the footage
Click or drag on the timeline to jump, scroll to zoom in, and Play every camera at once at ×¼ to ×4 speed. Events only skips the quiet hours and plays just the moments that matter.
Bookmark a moment
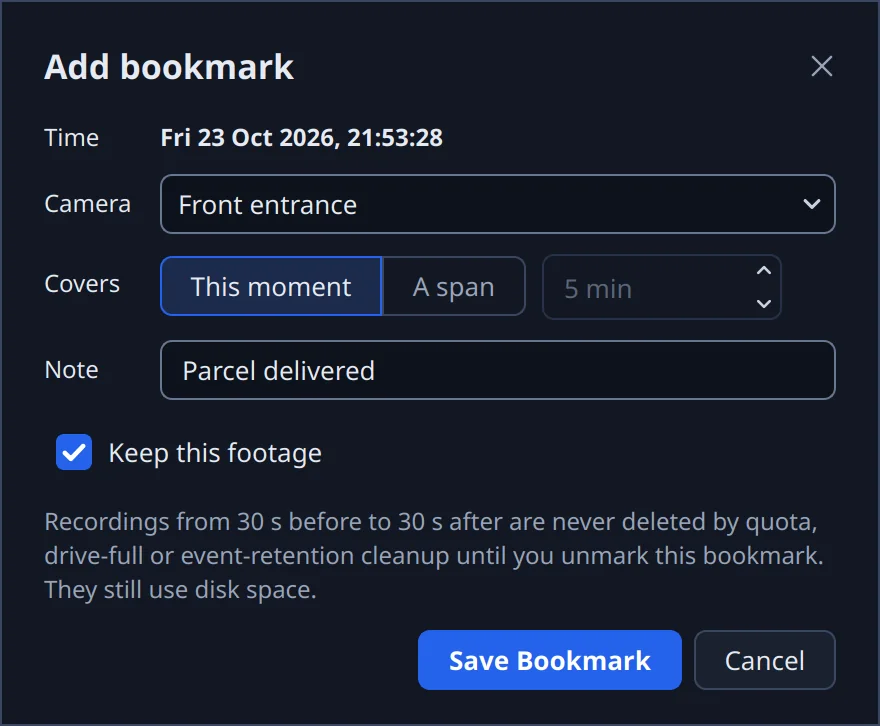
Pause on something worth finding again and click Add Bookmark. Add a note; tick Keep this footage and that moment is kept, even when the drive fills up, until you remove the bookmark.
Motion detection and events
Events are what happened: motion, line crossings and other camera alerts, cameras going offline, recordings failing, and your bookmarks.
Turn on motion detection
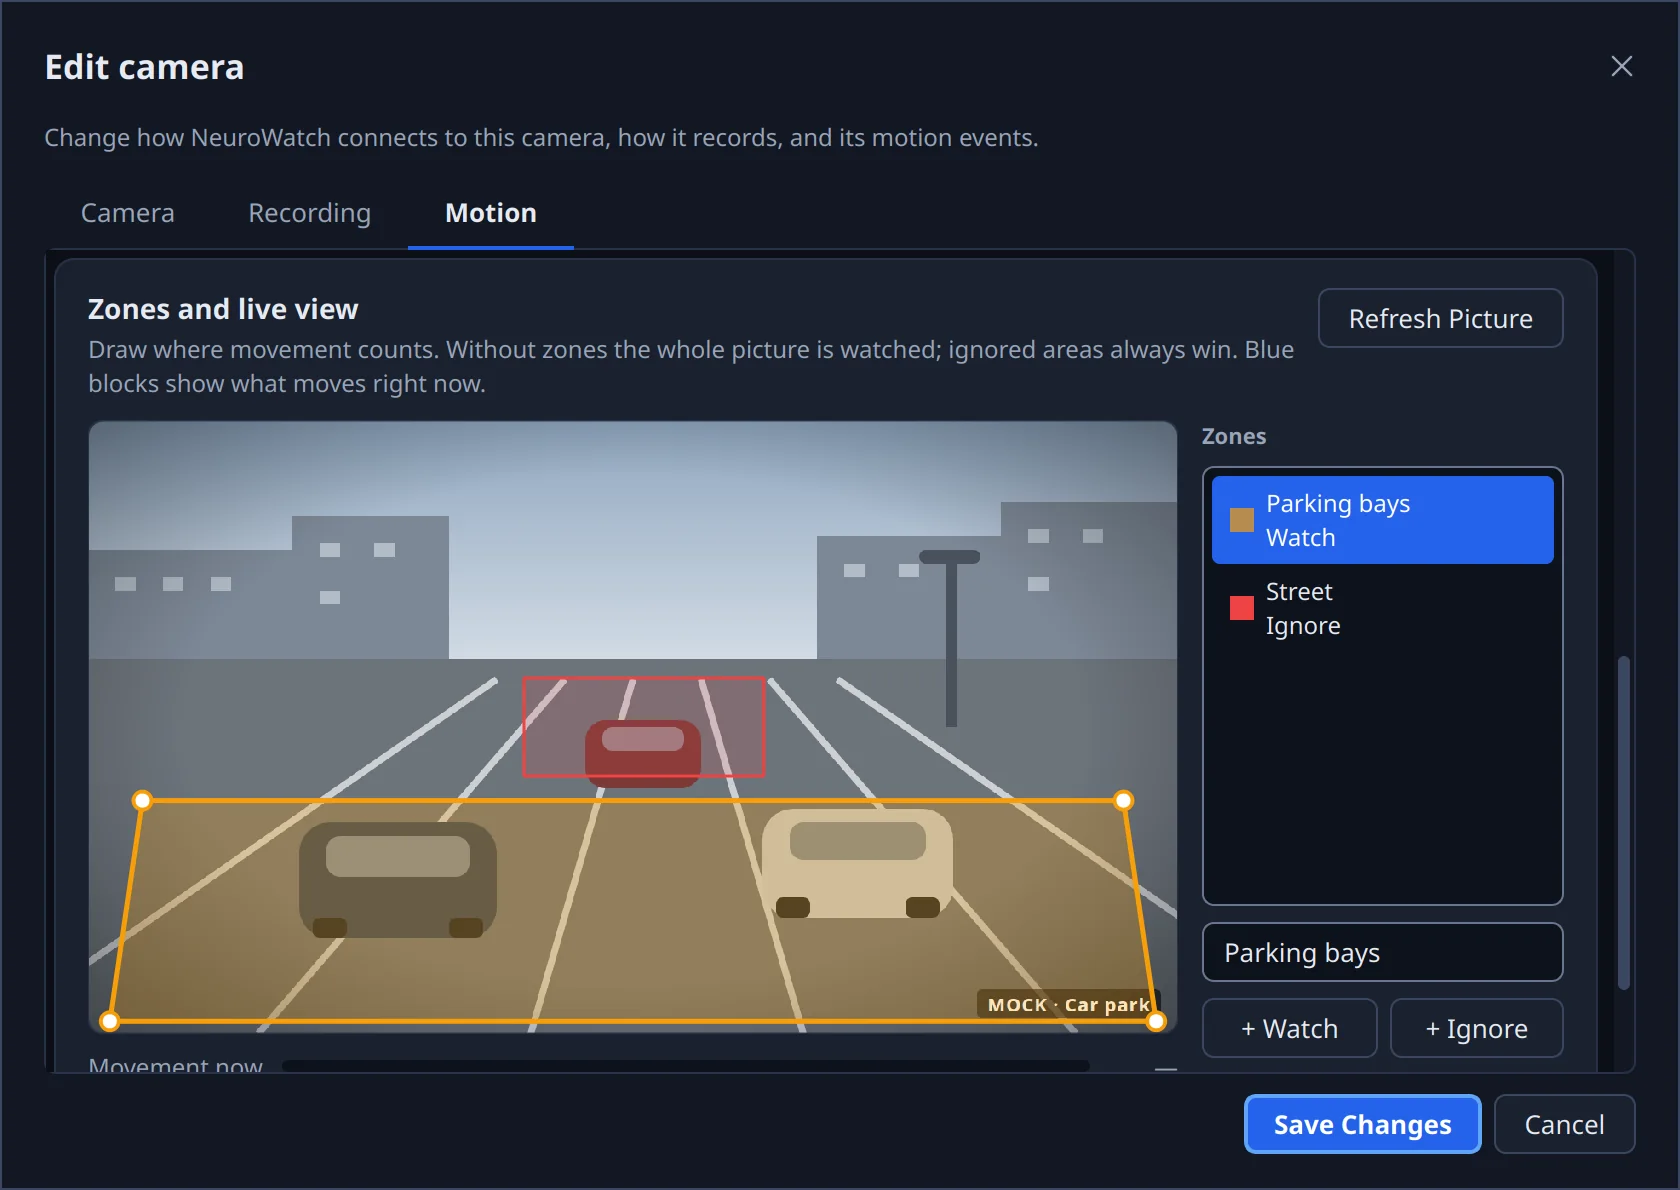
To use the camera's own detection, select the camera, click Edit Camera and open Motion. For NeuroWatch's detection, open Plugins, choose NeuroWatch Motion, click Bind Camera… and draw zones in the camera's Settings: + Watch adds an area where movement counts, + Ignore one where it never does.
Review events
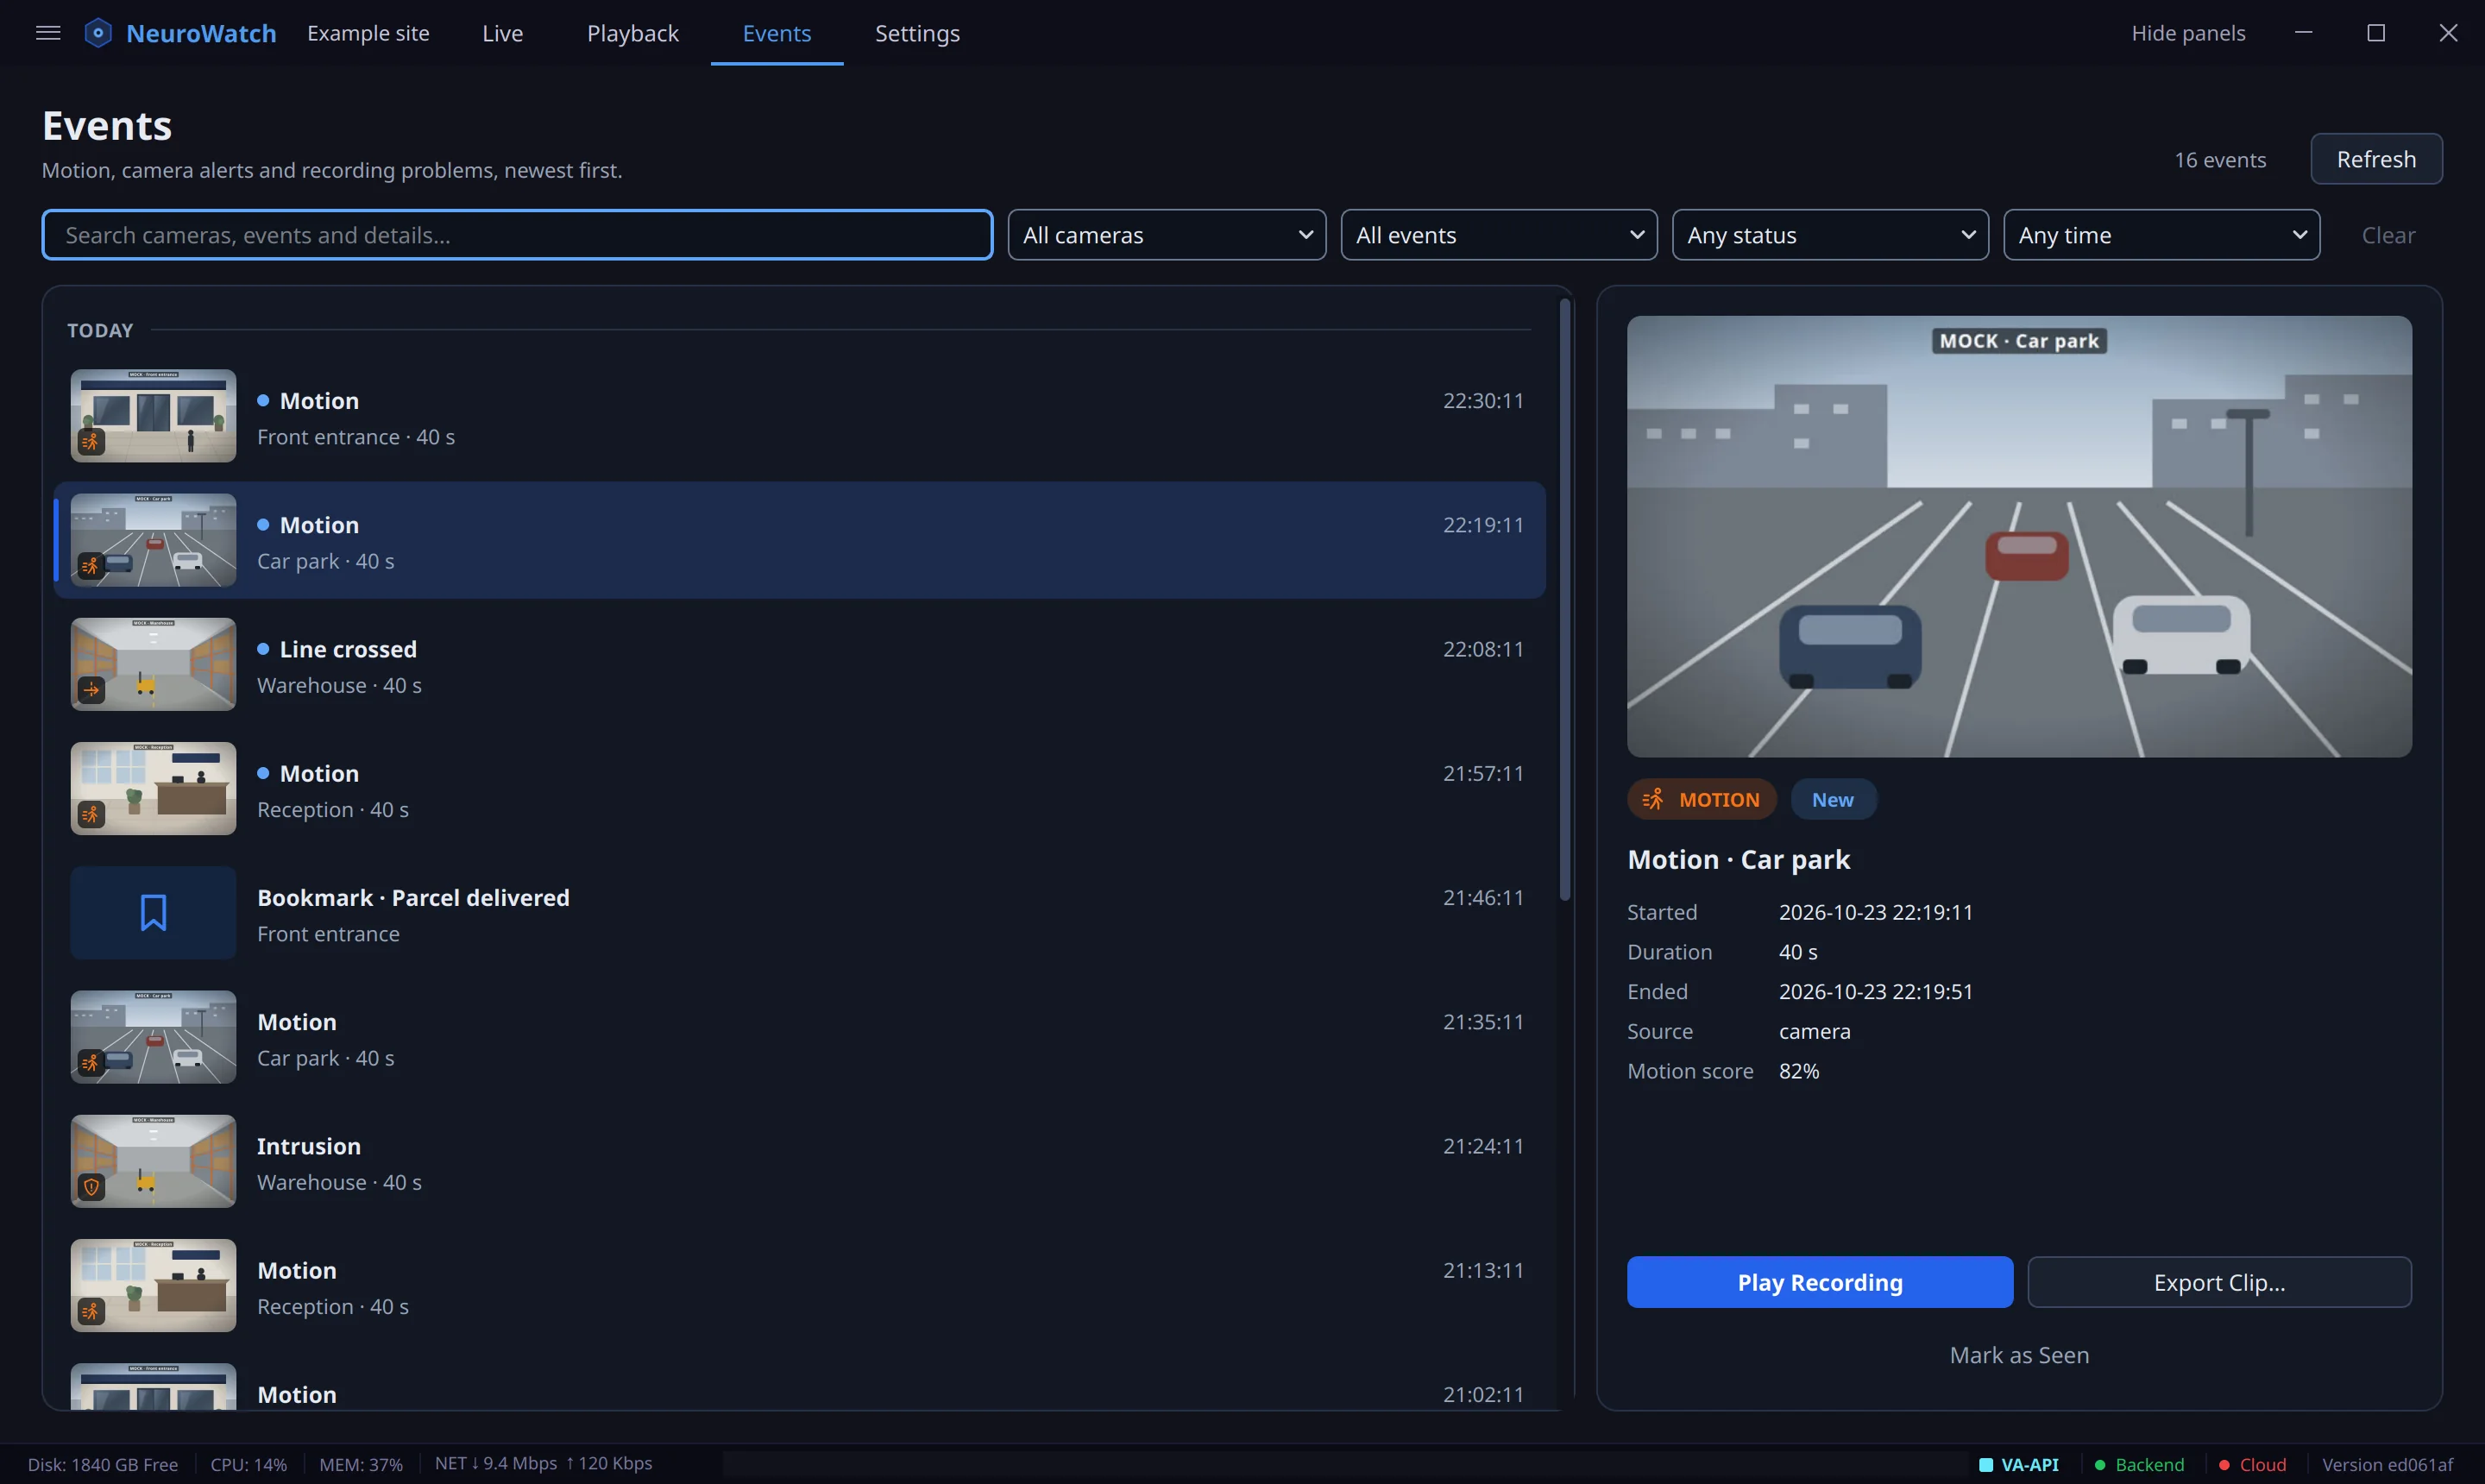
The Events tab lists events newest first, with a picture of each. Filter by camera, type, status or time. Play Recording opens that moment in Playback, and Export Clip… saves it as a video.
Get alerts
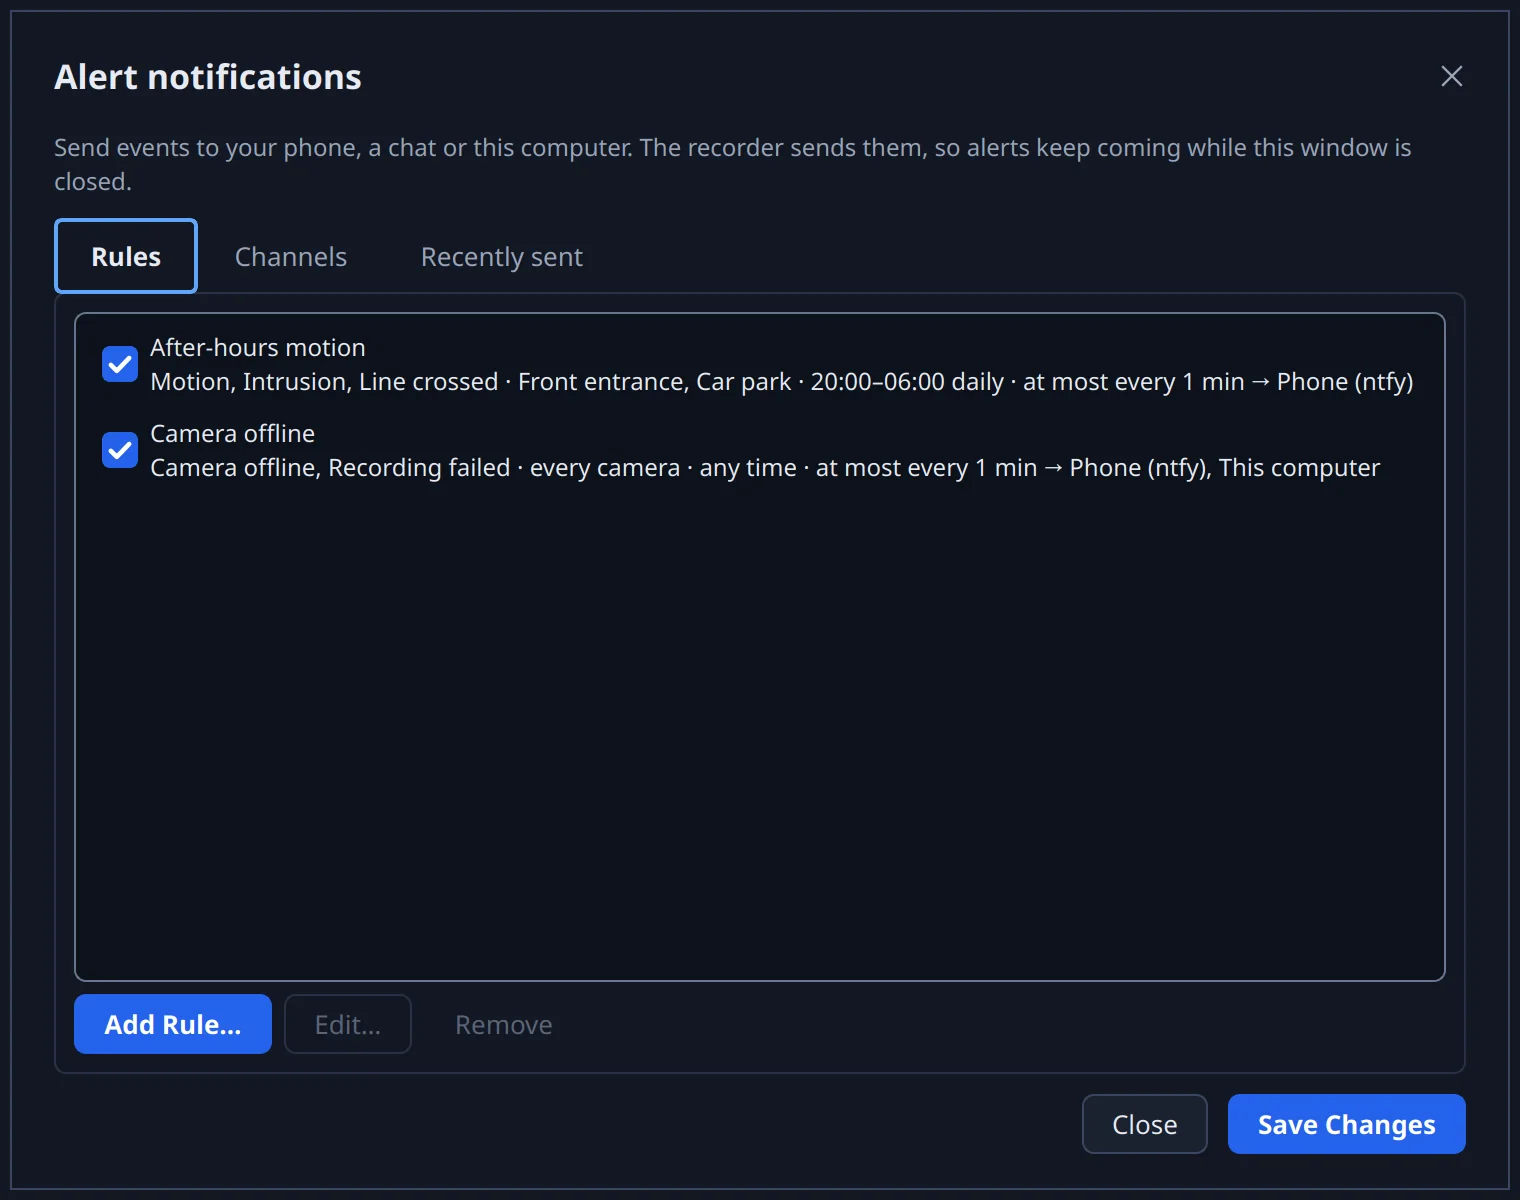
Open the menu at the top left (≡) and choose Alert Notifications…. Choose where alerts go, such as this computer, your phone (with the free ntfy app) or a Telegram chat, then decide which events to send and when, for example motion after hours only. Alerts keep coming even when the app is closed.
Export a clip
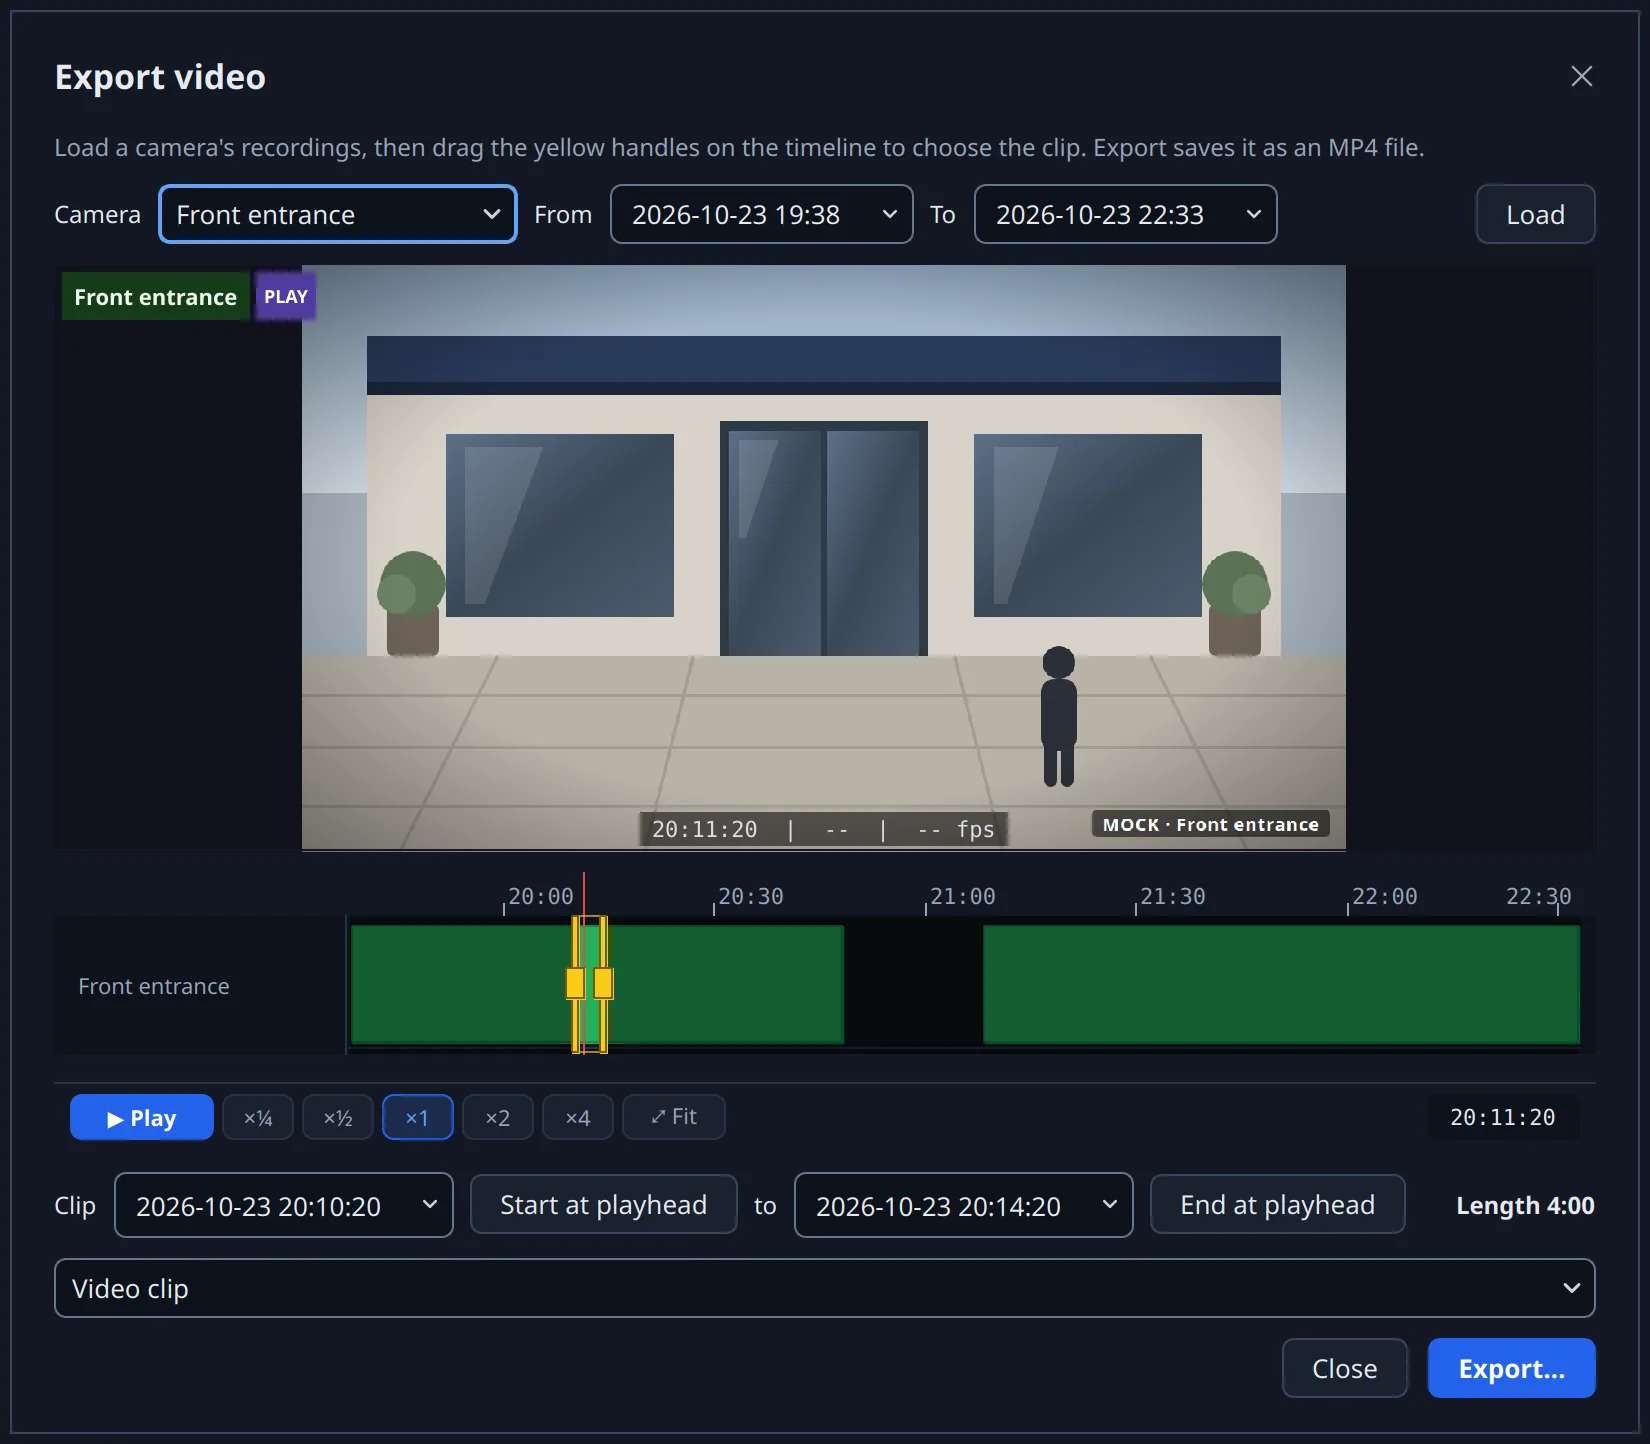
Save part of a recording as an MP4 file, to share it or keep it somewhere else.
Choose the clip
Open the menu at the top left (≡) and choose Export Video…, or Export Clip… on an event. Pick a camera and a time range and click Load, then drag the yellow handles on the timeline, type the times, or use Start at playhead and End at playhead.
Save it
Click Export… and choose where to save it. Exports are quick and keep every detail of the original footage.
Link to NeuroWatch Cloud
Linking lets you watch live and review recordings from any browser, with no router changes, port forwarding or VPN. It is optional: the recorder keeps recording and playing back on its own without it, and you can unlink at any time.
Create an enrollment code
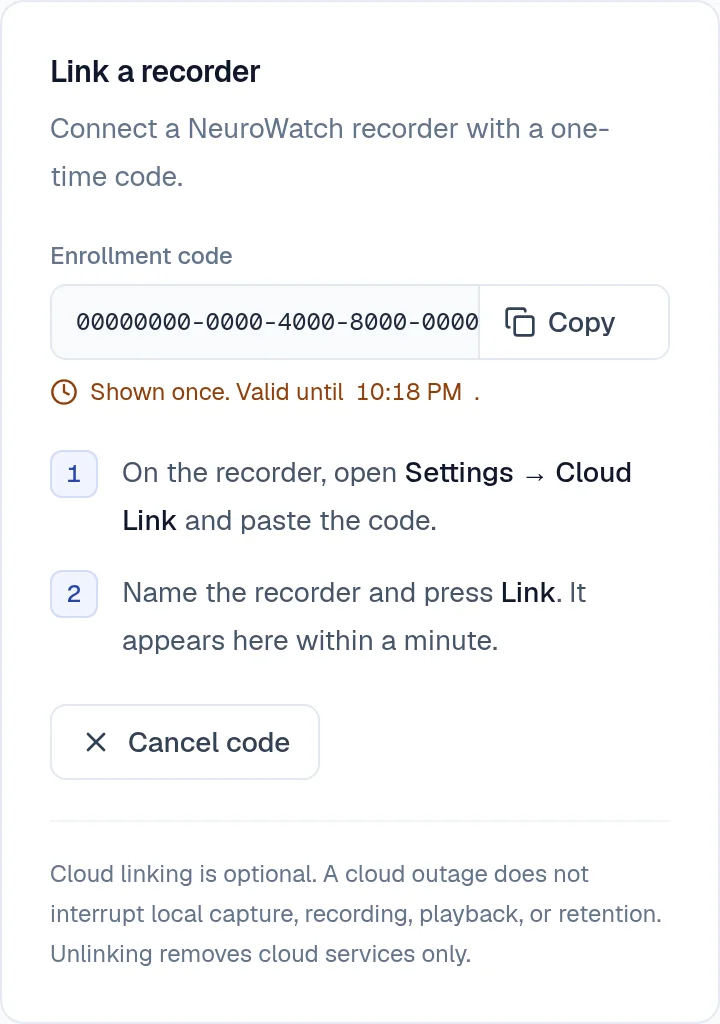
Sign in to NeuroWatch Cloud, open Recorders and choose Create enrollment code. Copy the code: it is shown once and expires after a few minutes.
Paste it on the recorder
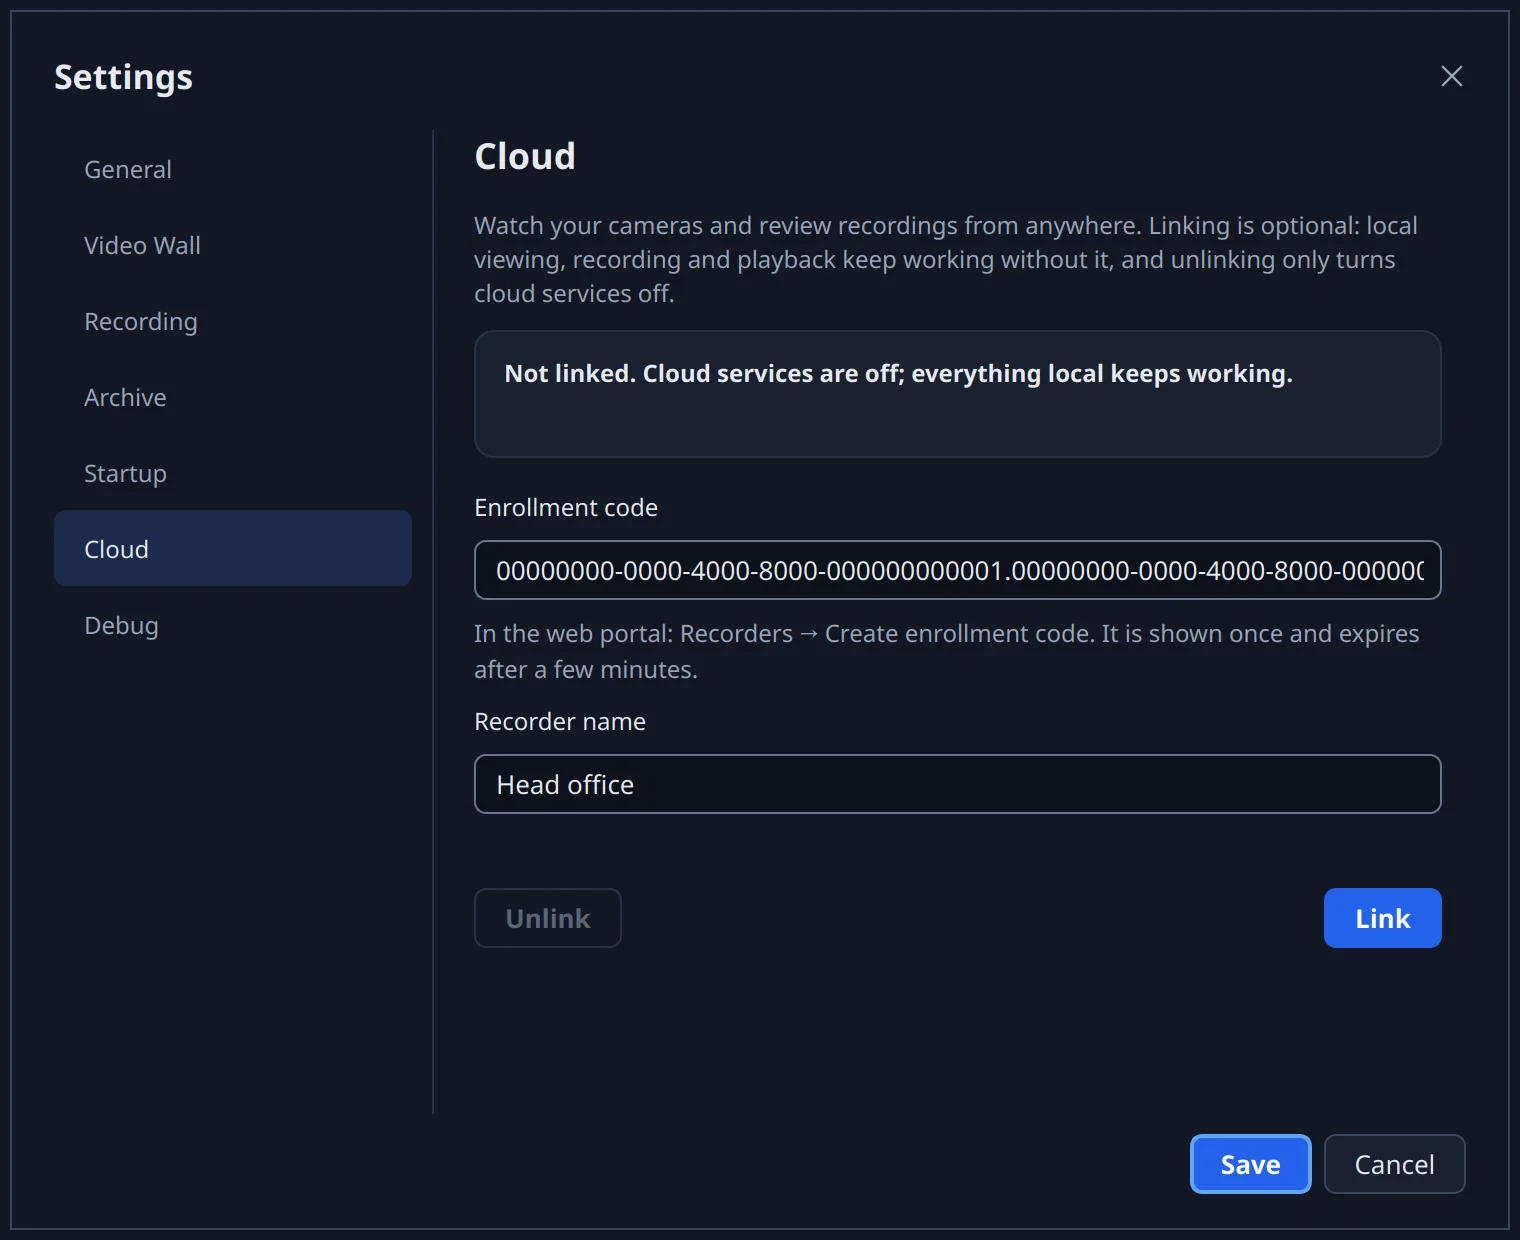
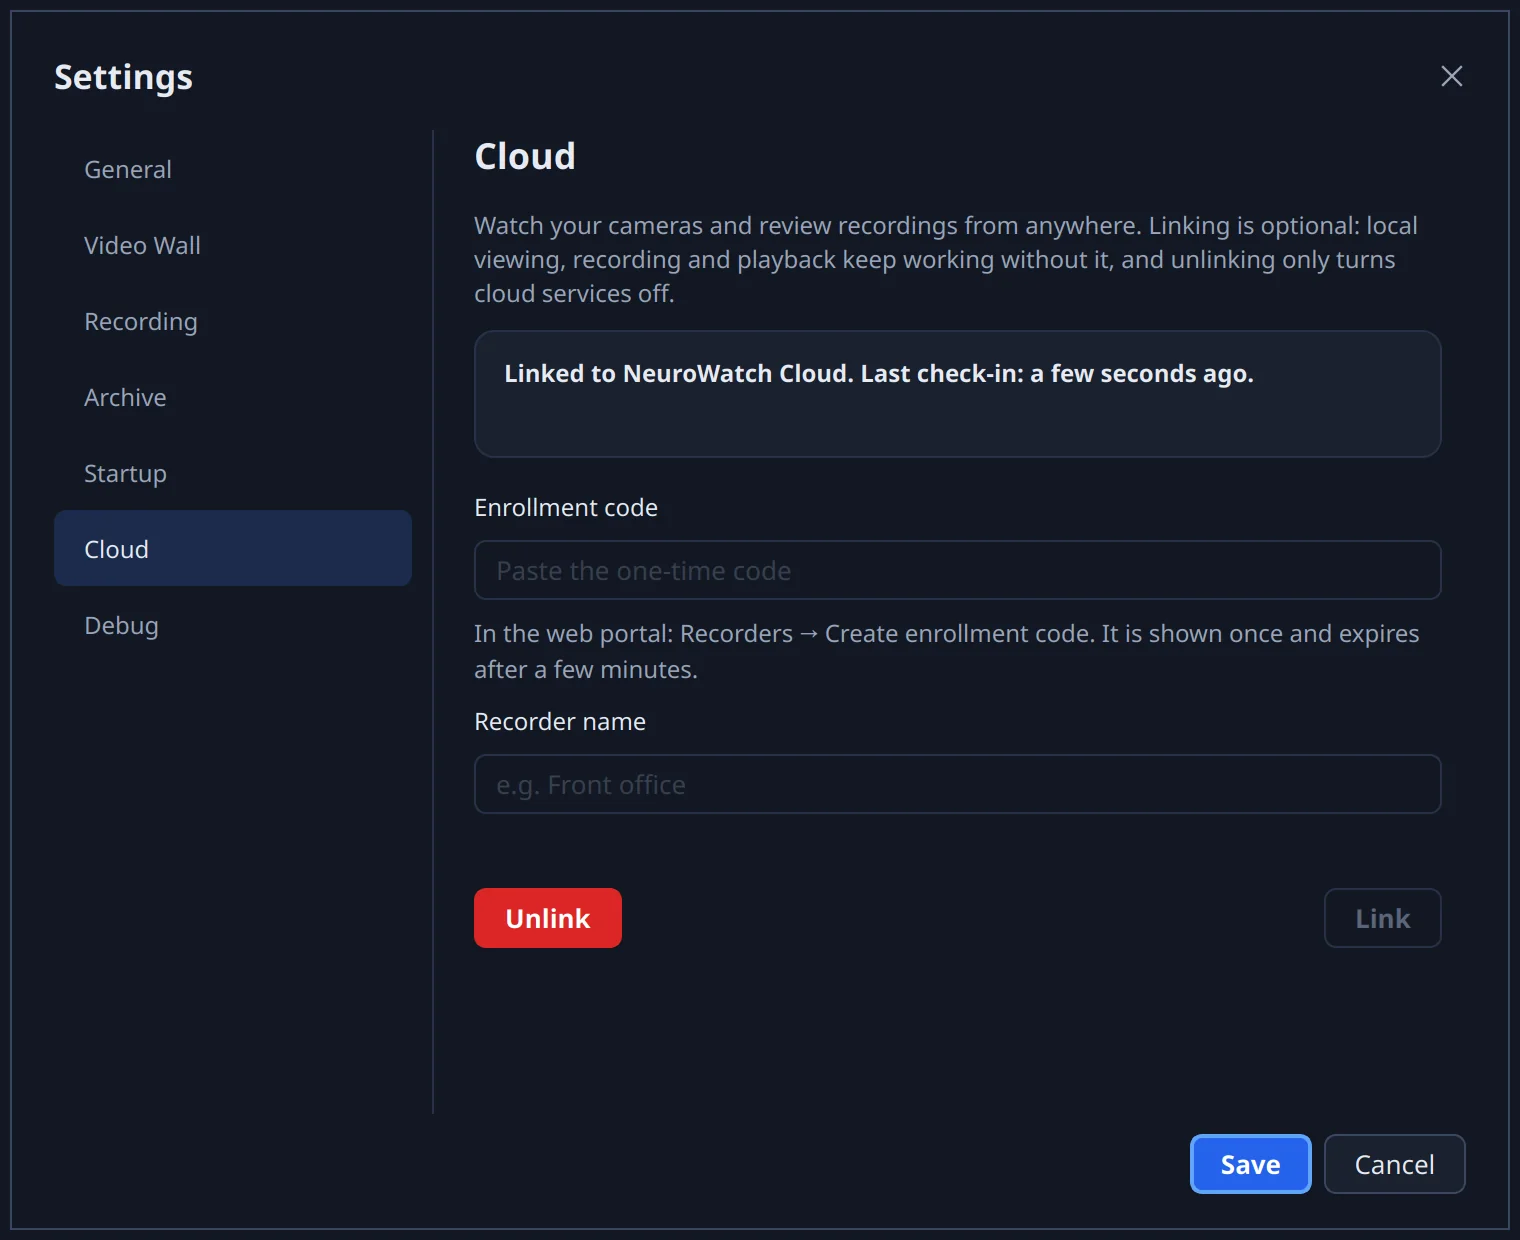
In NeuroWatch on the recorder, open Settings → Cloud. Paste the code into Enrollment code, give the recorder a name, and click Link.
Check the link
The Cloud page says Linked to NeuroWatch Cloud, and the recorder appears under Recorders in the portal within a minute. Unlink turns cloud services off again.
Watch and review from anywhere
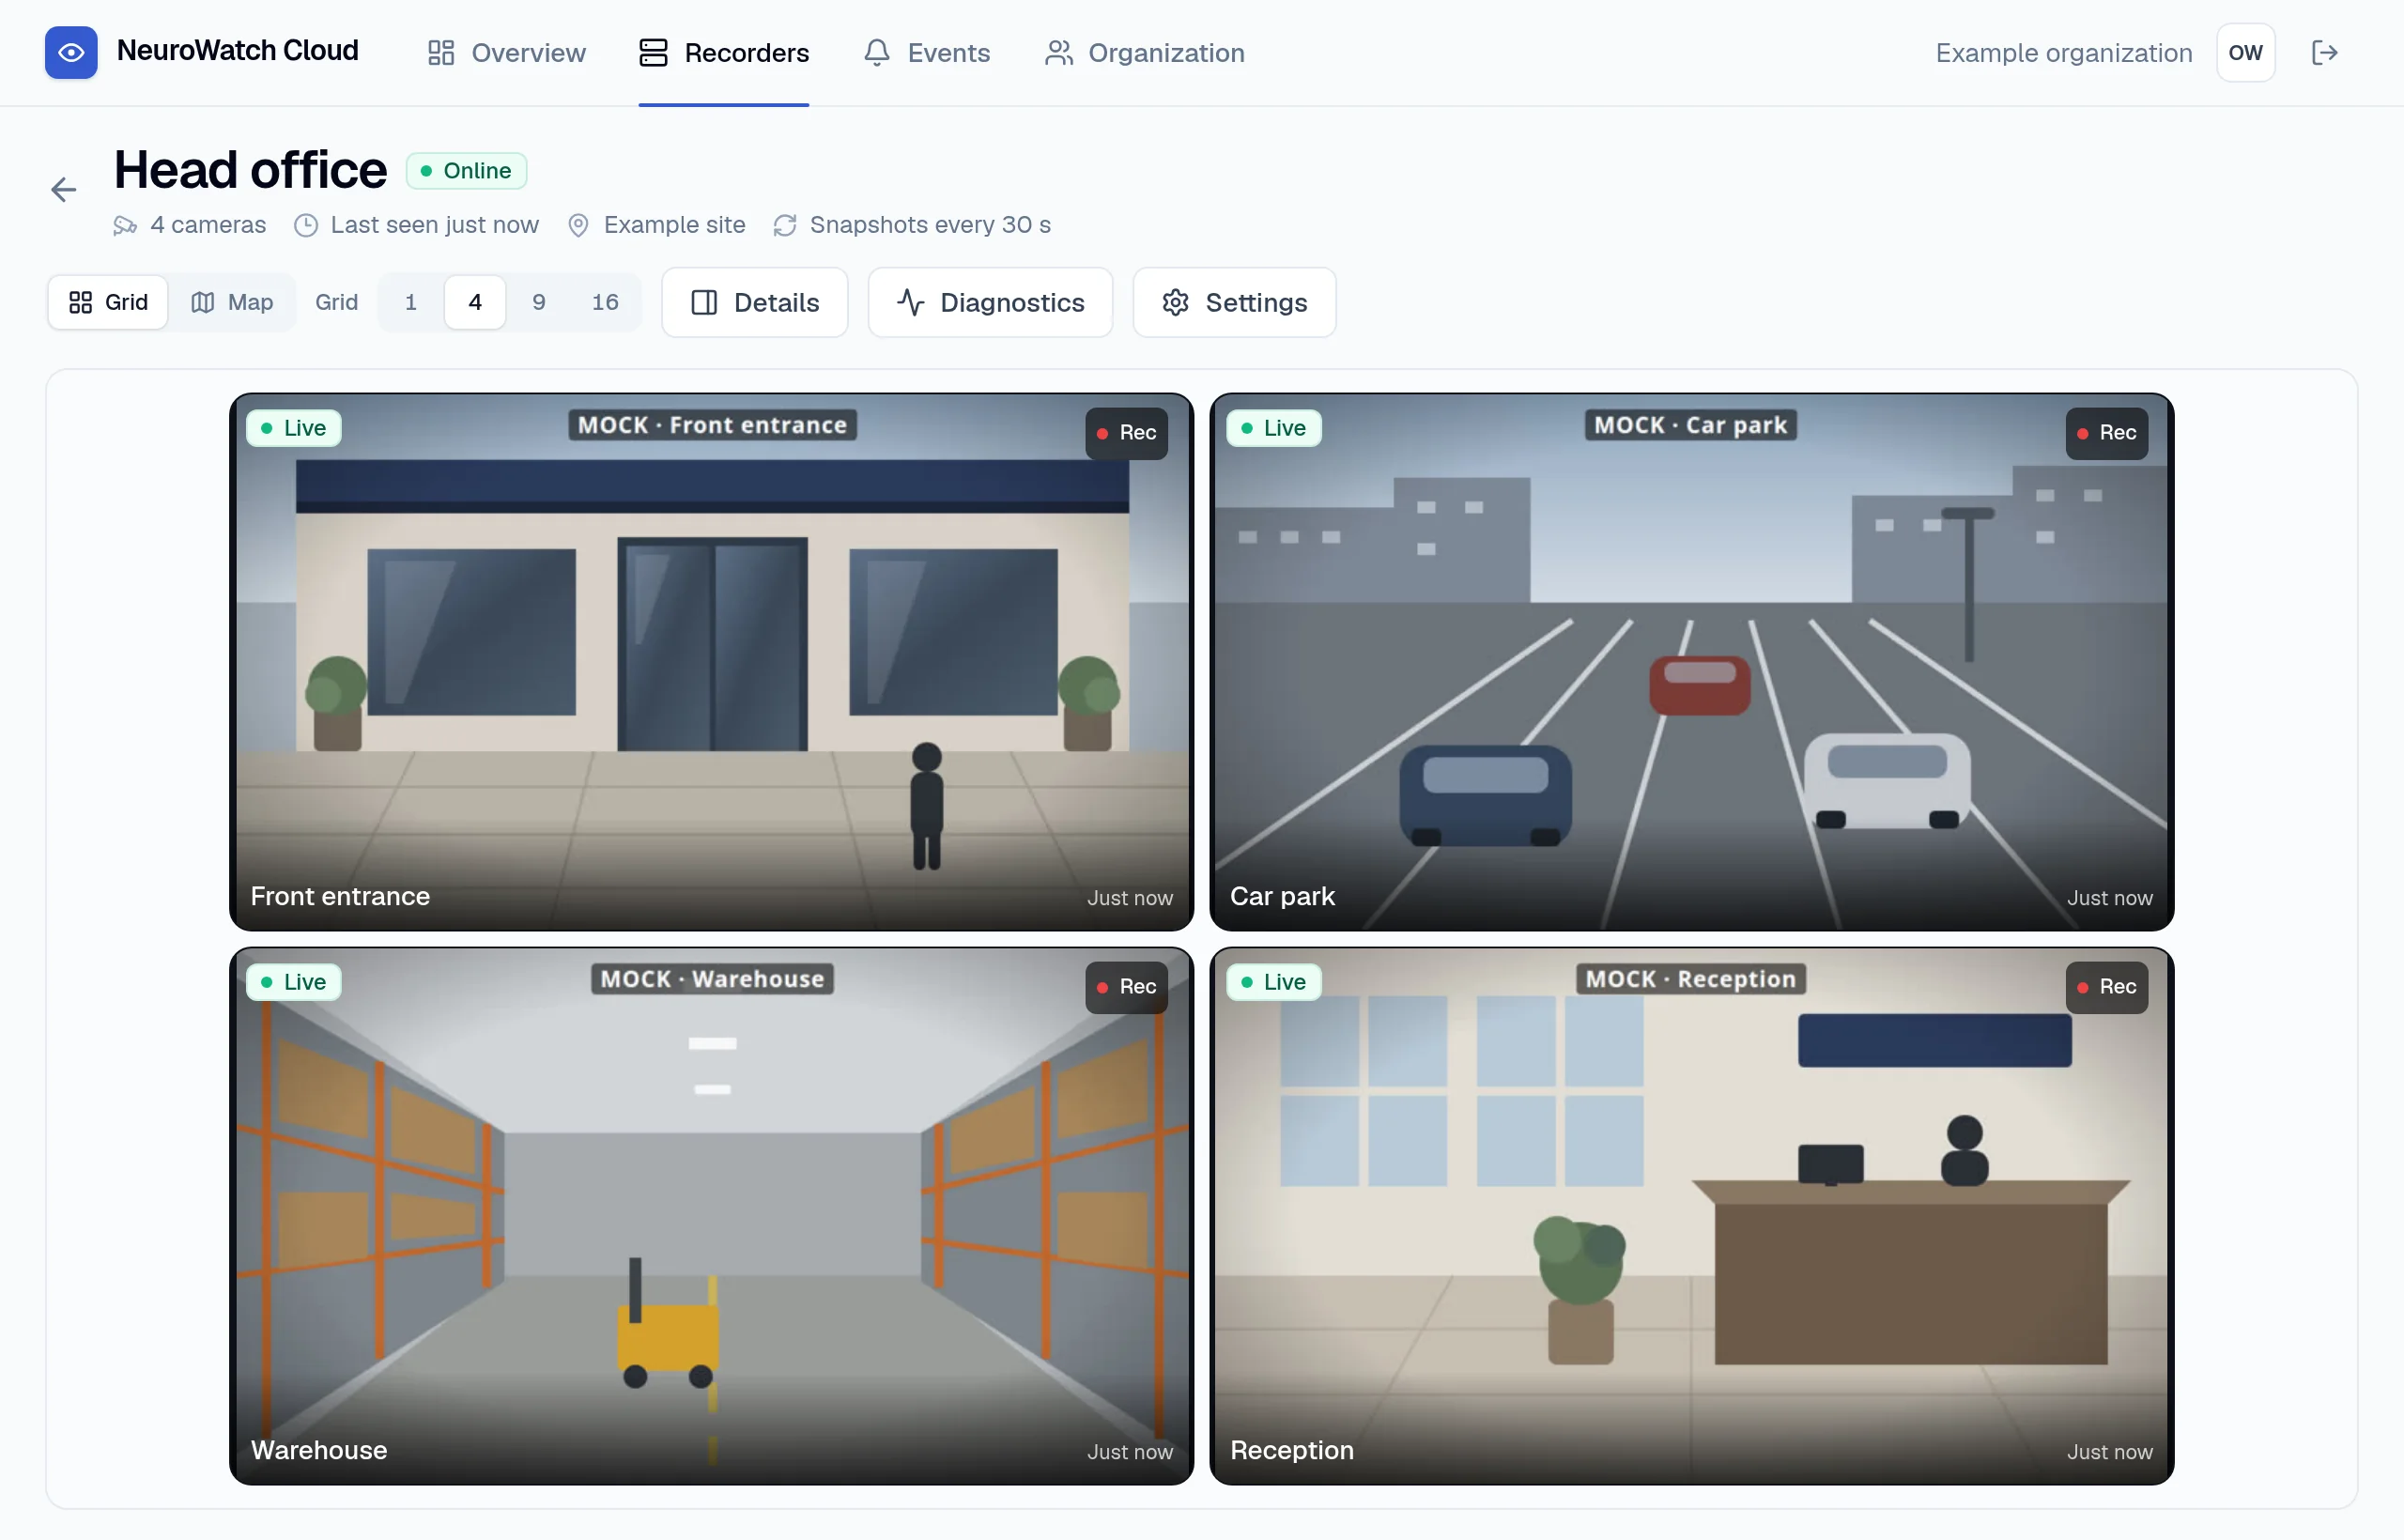
The portal shows every linked recorder and its cameras, from any browser.
Open a recorder
Recorders lists every linked recorder. Open one to see a snapshot of each camera, refreshed every 30 seconds, then open a camera to watch it live.
Watch recordings in the browser
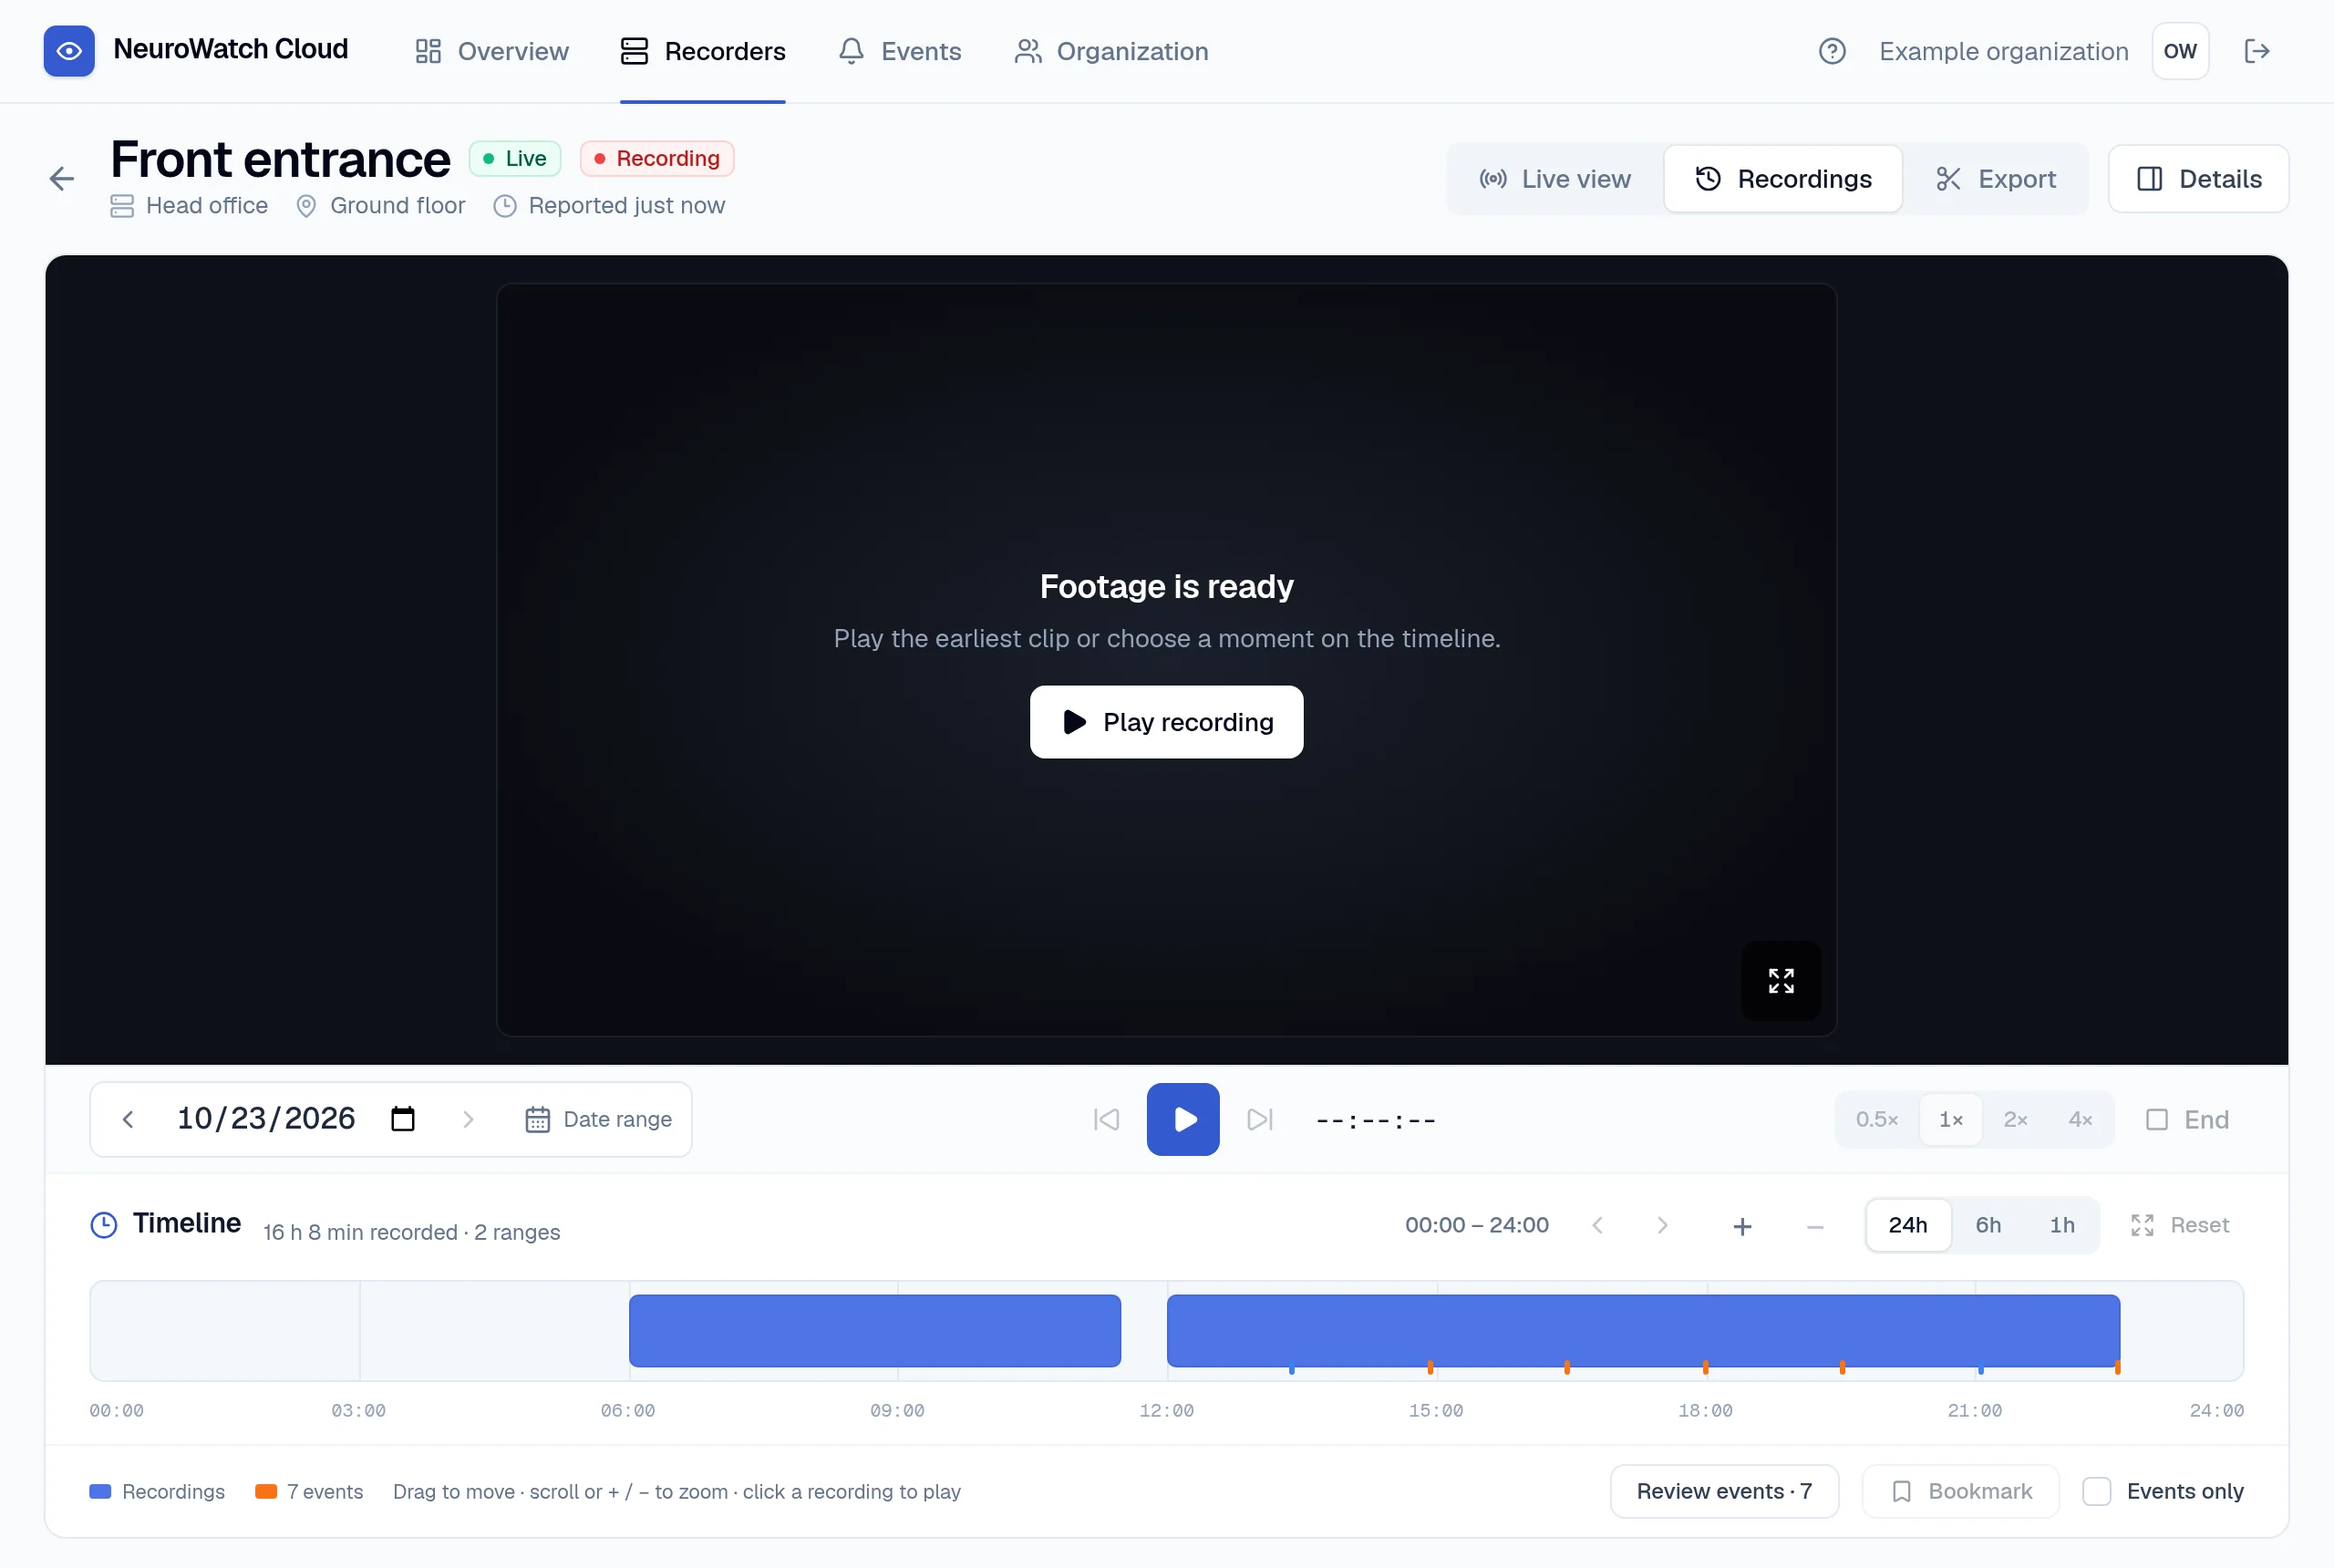
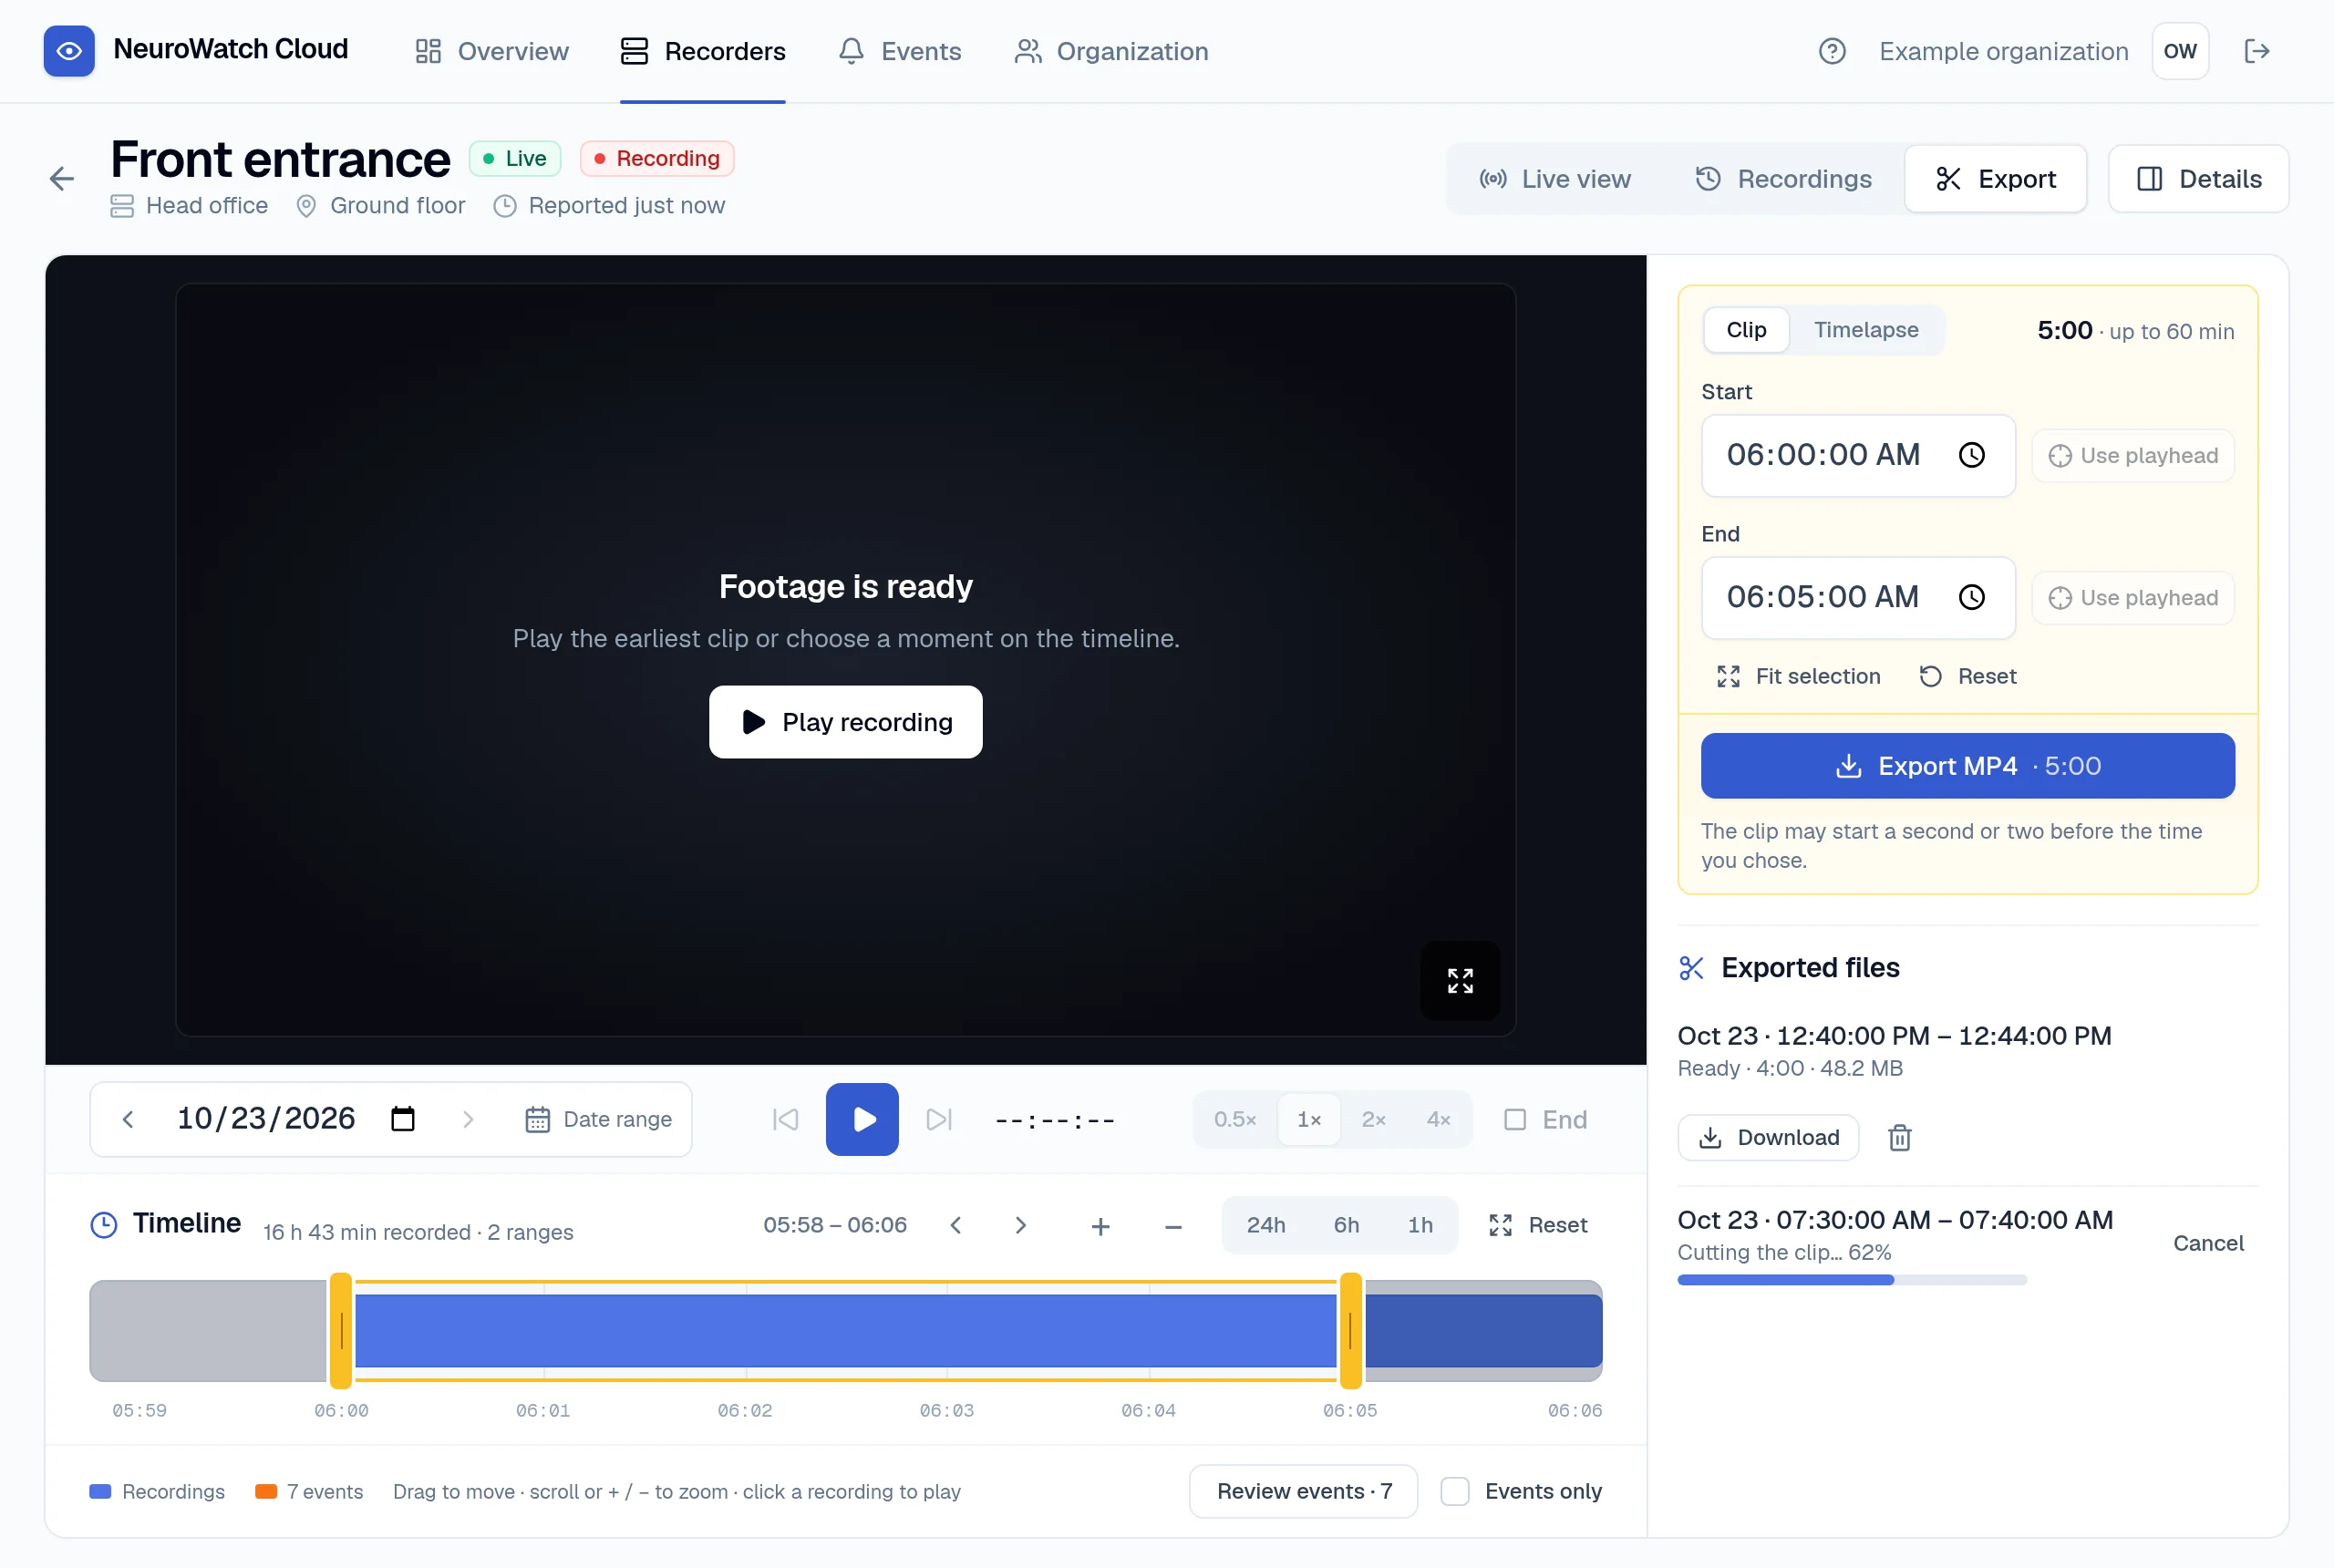
On a camera, switch between Live view, Recordings and Export. In Recordings, choose a day, or a Date range of up to 31 days, then Play recording or click the timeline. On a phone, pinch the video to zoom and drag the timeline to move through the day.
Review events
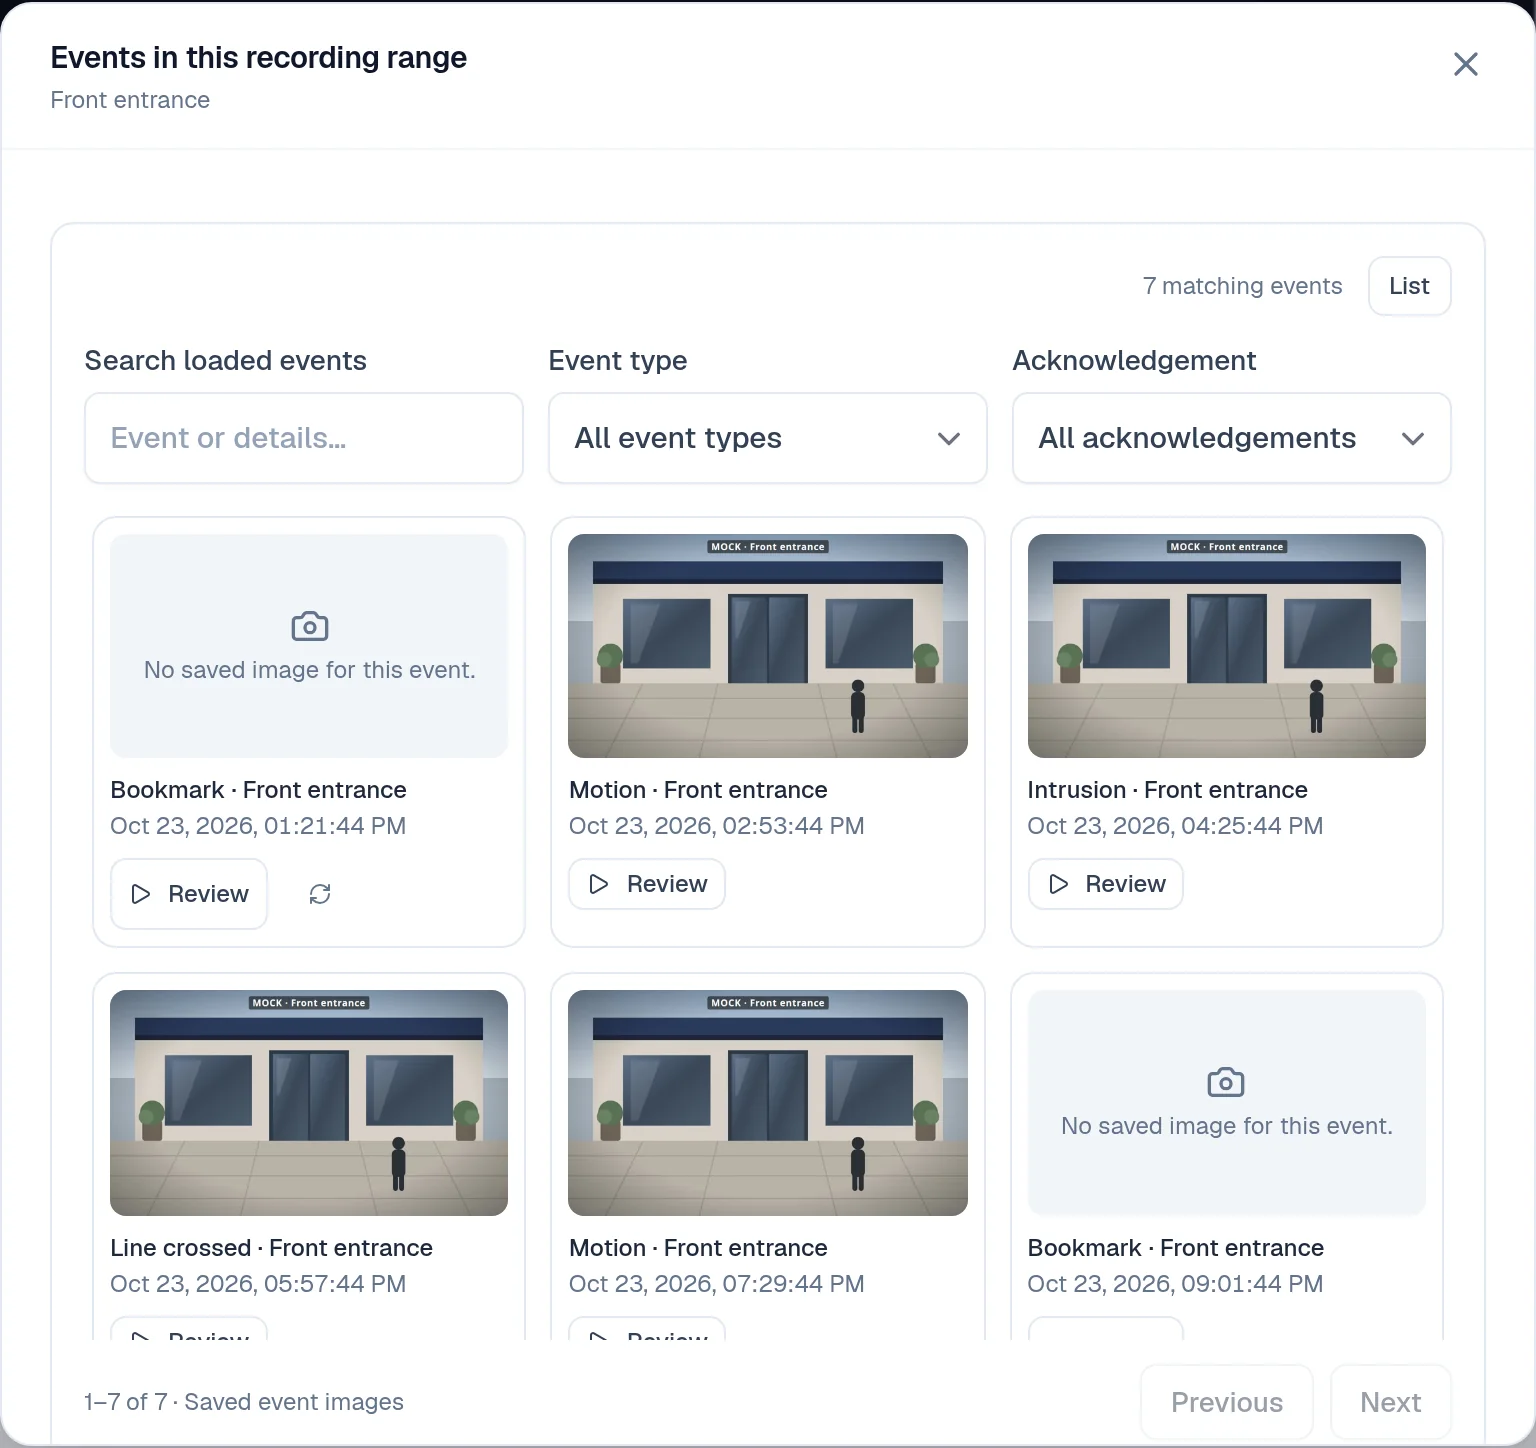
Review events shows the events in the loaded range with their pictures; Review plays one. Events only skips the quiet footage in between.
Export from anywhere
Export puts the clip on the timeline as yellow handles. Drag them, type the Start and End, or Use playhead, then click Export MP4. The recorder cuts the clip and it appears under Exported files with a Download button. Timelapse turns a long span into a short video.
Every event in one place
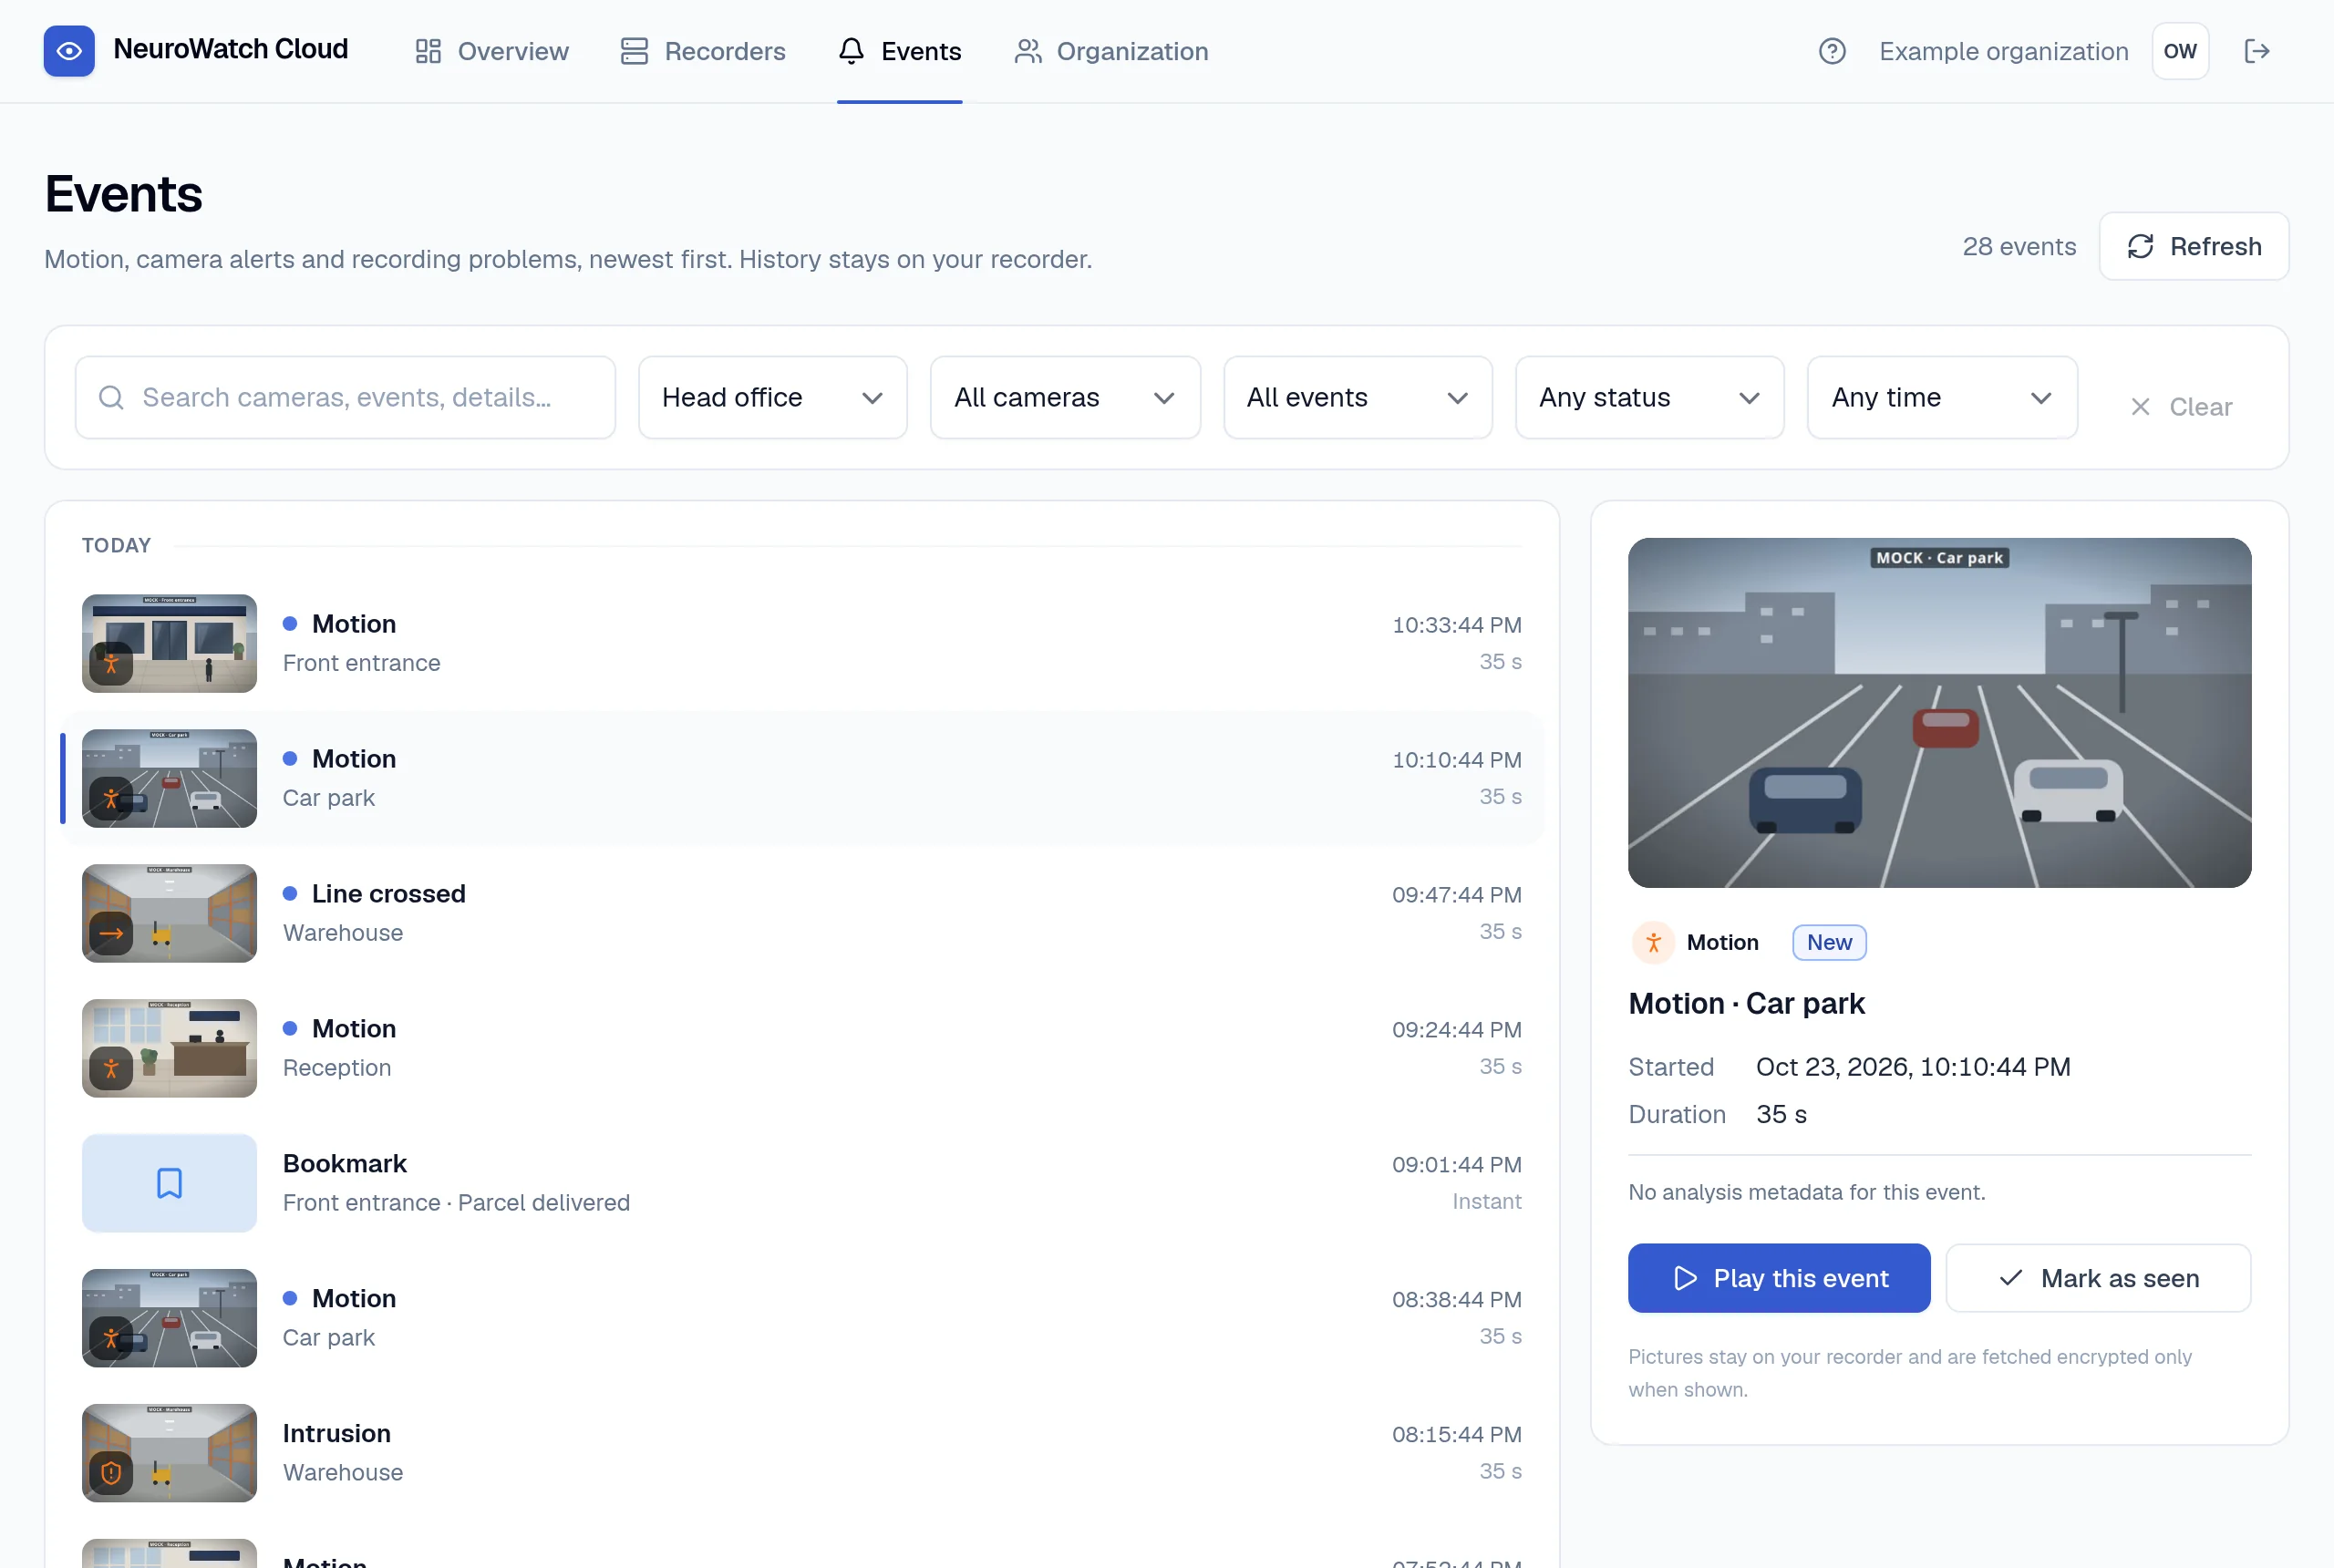
The portal's Events page lists a recorder's events, newest first; choose the recorder at the top. Select an event to see its picture. Pictures stay on your recorder and are sent to you privately, only when you look.
If something does not work
The most common snags, and what to do about them.
The search finds no cameras
Some cameras don't announce themselves on the network. Choose Set Up Manually… and enter the camera's address instead; you'll find it in the camera's own app or in your router's list of devices.
The enrollment code is refused
Codes are shown once and expire after a few minutes. Cancel the code in the portal, create a new one, and paste it straight away.
The portal shows the recorder offline
Check that the recorder computer is on and has internet access. That is all it needs: no router changes. Recording carries on while it is offline, and the portal catches up as soon as it is back.